How to follow an efficient wiper blade fitting workflow

Poorly fitted or incompatible wiper blades frustrate countless Australian drivers every year, leading to streaking, noise, and compromised visibility during critical weather conditions. Whether you’re tackling heavy rain, scorching UV exposure, or sudden storms, proper wiper blade installation ensures your safety and driving comfort. This guide walks you through a reliable, step-by-step workflow designed specifically for DIY enthusiasts seeking weather-adaptable solutions. You’ll learn how to select compatible blades, prepare your workspace, execute the fitting process flawlessly, and troubleshoot common issues to achieve optimal performance every time.
Table of Contents
- Key takeaways
- Understanding your wiper blade needs: vehicle compatibility and weather considerations
- Preparing your tools and workspace for a smooth wiper blade change
- Step-by-step workflow to replace and fit your wiper blades perfectly
- Verifying the fit and troubleshooting common wiper blade issues
- Explore premium wiper blades designed for your car model
- Frequently asked questions
Key Takeaways
| Point | Details |
|---|---|
| Vehicle compatibility matters | Selecting blades starts with identifying your vehicle’s make, model and year to confirm blade length and attachment type for a proper fit. |
| Climate based blade choice | Silicone blades resist UV and heat, improving durability in harsh climates, while rubber blades offer value in moderate conditions but may require more frequent replacement. |
| Blade design options | Be aware of conventional frames, beam blades and hybrid designs to select the best option for your vehicle and driving conditions. |
| Prep and verify | Before fitting, gather the right tools and verify blade length and attachment type using your owner’s manual or a photo reference of the existing mechanism to prevent misfits. |
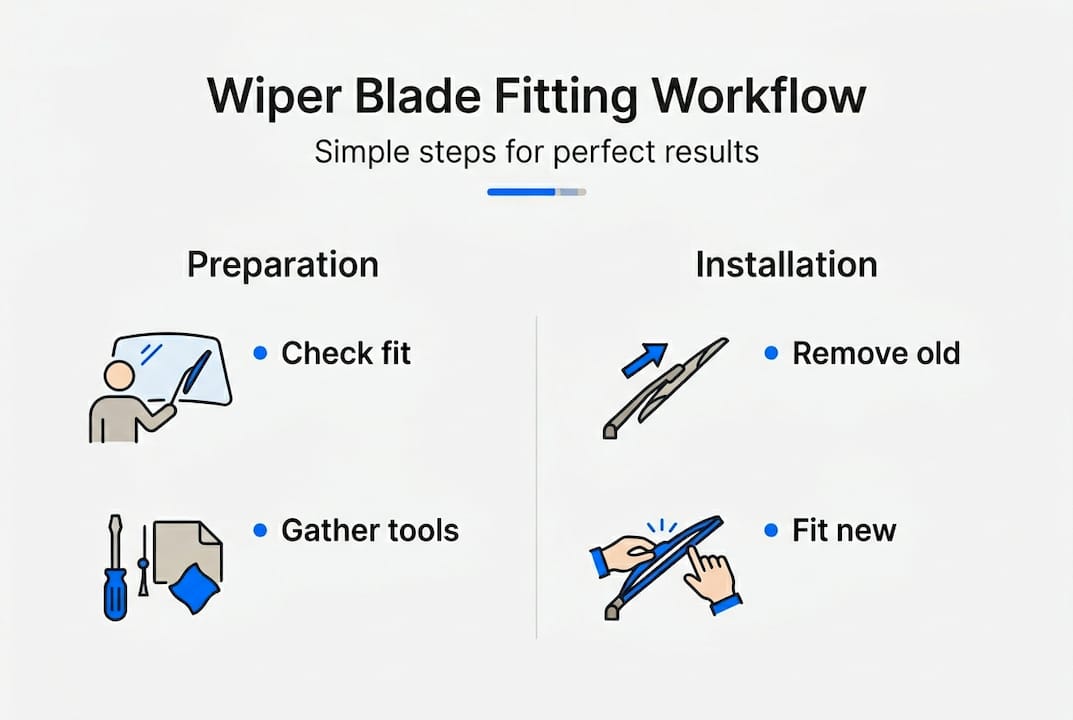
Understanding your wiper blade needs: vehicle compatibility and weather considerations
Selecting the right wiper blades starts with identifying your vehicle’s specific requirements. Every car model demands particular blade sizes, attachment types, and designs to function properly. Choosing the correct wiper blades based on vehicle model ensures a perfect fit and optimal performance, eliminating guesswork and reducing installation frustration.
Australian weather conditions vary dramatically across regions, from tropical downpours in Queensland to intense UV exposure in Western Australia and occasional snow in alpine areas. Your blade material choice directly impacts durability and effectiveness. Silicone blades typically outlast traditional rubber in harsh climates, resisting UV degradation and maintaining flexibility across temperature extremes. Rubber blades offer excellent value for moderate conditions but may require more frequent replacement in intense heat or cold.
Common blade designs include conventional frames, beam blades, and hybrid styles. Conventional blades use a metal framework with multiple pressure points, suitable for older vehicles and budget-conscious drivers. Beam blades feature a single curved strip that distributes pressure evenly across the windscreen, delivering superior performance in high-speed driving and variable weather. Hybrid designs combine frame stability with aerodynamic benefits, offering balanced performance for modern vehicles.
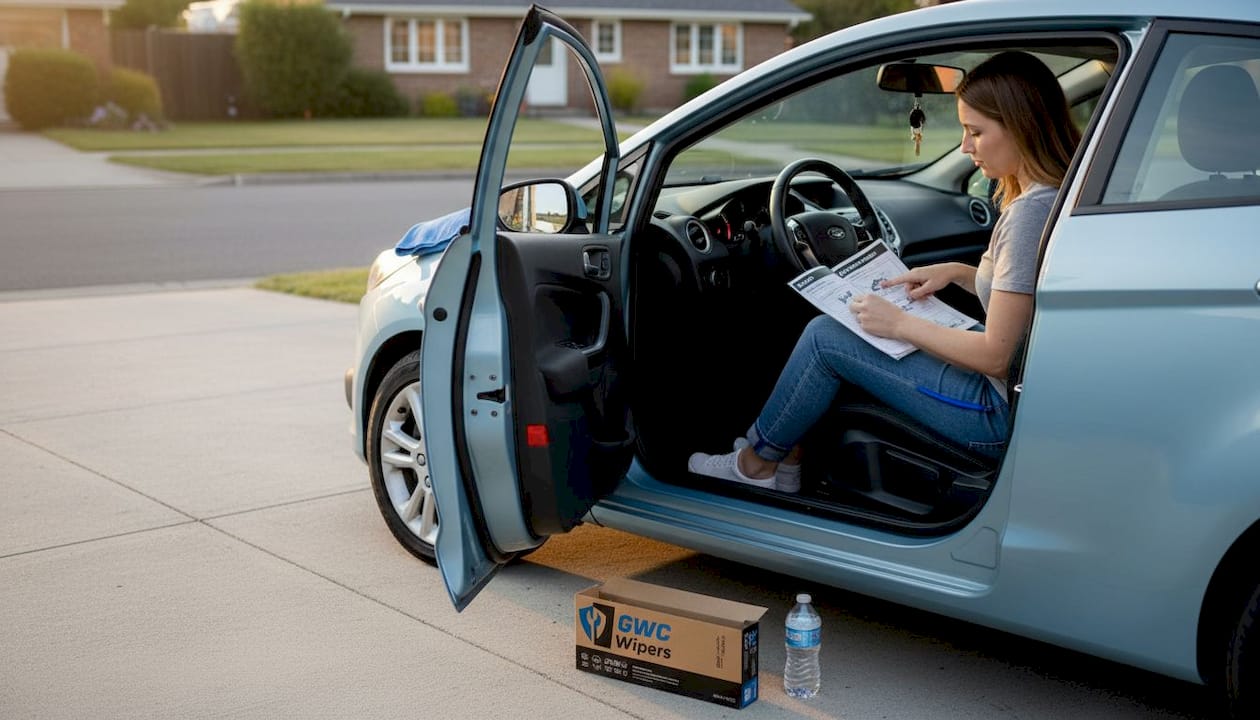
Before starting your fitting workflow, gather essential information and tools. You’ll need your vehicle’s make, model, and year to confirm blade specifications. Check your owner’s manual or measure existing blades to verify length requirements. Different blade types and fitting methods may vary according to car make and model, so reviewing your wiper blade compatibility guide prevents costly mistakes.
Pro Tip: Take a clear photo of your current wiper blade attachment mechanism before removal. This visual reference helps you identify the correct connector type and simplifies installation when fitting new blades, especially if you’re working with unfamiliar attachment systems.
Prepare a clean workspace away from direct sunlight to prevent blade material from becoming sticky or difficult to handle. Extreme temperatures can affect rubber flexibility during installation, making shaded areas ideal for this task. Keep a microfibre cloth handy to clean your windscreen and wiper arms before fitting new blades, ensuring optimal contact and performance from the start.
Preparing your tools and workspace for a smooth wiper blade change
Proper preparation transforms wiper blade replacement from a frustrating chore into a straightforward maintenance task. Having the right tools and clear workspace reduces installation errors and damage risk, protecting both your new blades and vehicle components.
Gather these essential items before beginning:
- Clean microfibre cloths for windscreen and blade cleaning
- Soft gloves to protect hands and prevent fingerprints on blades
- Small flathead screwdriver for stubborn clips or connectors
- Towel or protective padding to place under wiper arms
- Measuring tape if verifying blade length
- Your vehicle’s owner manual for reference
Choose a shaded, dry location for your workspace. Direct sunlight heats windscreen glass and blade materials, making handling uncomfortable and potentially affecting rubber flexibility. Rain or moisture complicates the process by making components slippery and harder to grip securely. A garage or carport provides ideal conditions, but a shaded driveway works perfectly if indoor space isn’t available.
Position your vehicle on level ground with the engine off and ignition key removed. Some vehicles require accessory mode to move wiper arms into a service position, so consult your manual for specific instructions. Never attempt blade replacement with the ignition on, as accidental wiper activation could cause injury or damage.
Place protective padding on your bonnet where wiper arms might rest during the process. This simple precaution prevents scratches and dents if an arm slips from your grip. Wiper arms contain strong springs that snap back forcefully when released, potentially cracking windscreens or damaging paintwork without proper cushioning.
Clean your windscreen thoroughly before installation. Dirt, debris, and old wiper residue interfere with new blade performance, causing premature wear and streaking. Use glass cleaner and a microfibre cloth to remove all contaminants, paying special attention to areas where blades make contact. Inspect wiper arms for corrosion, damage, or misalignment that might affect new blade performance.
Pro Tip: Mark your current blade position with a small piece of masking tape on the windscreen before removal. This reference point helps you verify correct new blade alignment during installation, ensuring even pressure distribution across the entire wiping surface.
Review your wiper blade fitting instructions specific to your vehicle model before starting. Different manufacturers use varying attachment mechanisms, and familiarising yourself with the process beforehand prevents confusion and reduces installation time. Keep instructions accessible throughout the workflow for quick reference if questions arise.
Step-by-step workflow to replace and fit your wiper blades perfectly
Follow this precise sequence to achieve professional-quality results:
-
Lift the wiper arm gently away from the windscreen until it locks in the vertical service position. Support the arm carefully to prevent spring tension from pulling it back against the glass.
-
Locate the release mechanism on your current blade. Most designs feature a small tab, button, or clip where the blade connects to the arm. Press or slide this release while gently pulling the blade away from the hook or connector.
-
Remove the old blade completely, noting how it attached to the arm. Examine the connector type closely, as this information guides new blade installation. Set the old blade aside for disposal or recycling.
-
Unwrap your new blade carefully, avoiding touching the rubber element with bare hands. Skin oils transfer to the rubber, potentially causing streaking during initial use.
-
Identify the correct adapter for your vehicle’s attachment mechanism. Premium blades include multiple adapters to fit various arm types. Proper stepwise instructions ensure reliable installation and maximise blade lifespan.
-
Align the adapter with the wiper arm hook or connector, ensuring the blade orientation matches the arm’s natural curve. The blade should curve toward the windscreen, not away from it.
-
Slide the blade onto the arm until you hear or feel a distinct click. This audible confirmation indicates secure attachment. Gently tug the blade to verify it’s locked in place and won’t detach during operation.
-
Lower the wiper arm slowly back to the windscreen, supporting its weight to prevent sudden impact. The blade should rest flat against the glass without gaps or raised sections.
-
Repeat the entire process for the second blade, maintaining consistent technique for both sides.
-
Test wiper operation at low speed initially, then progress to higher settings. Listen for unusual sounds and watch for smooth, even movement across the windscreen.
Common attachment mechanisms vary by manufacturer:
| Attachment Type | Description | Common Vehicles |
|---|---|---|
| Hook (J-hook) | Simple curved hook, most common design | Majority of vehicles pre-2010 |
| Pin arm | Small pin through blade connector | European models, some Asian vehicles |
| Bayonet | Push-and-twist locking mechanism | Modern European and luxury vehicles |
| Side pin | Pin on side of arm requiring slide attachment | Select Toyota, Lexus models |
| Push button | Button release with slide-off removal | Many post-2015 vehicles |
Signs of correct fit include the blade sitting flush against windscreen glass, no visible gaps between rubber and glass, even pressure across the entire blade length, and smooth movement without catching or skipping. If you notice resistance during arm movement or uneven blade contact, remove and reinstall the blade, checking adapter orientation and secure locking.
Pro Tip: Apply a tiny amount of silicone lubricant to stiff pivot joints if your wiper blade fitting workflow example reveals binding or resistance. Avoid getting lubricant on the rubber element or windscreen, as this causes streaking and reduced cleaning effectiveness.
Special cases require additional attention. Some vehicles feature hidden or covered wiper mechanisms requiring bonnet opening or trim removal for access. Rear wiper blades often use different attachment systems than front blades, so verify specifications separately. Heated wiper systems demand compatible blades that accommodate electrical connections without interference.
Verifying the fit and troubleshooting common wiper blade issues
Post-installation verification prevents performance problems and extends blade lifespan. Run your wipers through several complete cycles at different speeds, observing movement patterns and listening for unusual sounds. Properly fitted blades move smoothly without chattering, streaking, or leaving unwiped sections.
Common symptoms after fitting reveal specific issues:
- Streaking across the windscreen indicates contaminated rubber, incorrect blade angle, or insufficient pressure
- Squeaking or chattering suggests improper installation, dirty windscreen, or blade misalignment
- Skipping sections means inadequate pressure distribution or worn wiper arm springs
- Juddering during operation points to oversized blades or incorrect attachment
- Water pooling in certain areas reveals uneven pressure or damaged rubber edge
Improper fitting often causes noise, streaking, or insufficient cleaning, which can be corrected by simple troubleshooting. Address problems immediately rather than hoping they resolve with use, as continued operation with faulty installation accelerates wear and potentially damages your windscreen.
This comparison table helps diagnose and fix installation issues:
| Problem | Likely Cause | Solution |
|---|---|---|
| Vertical streaks | Contaminated blade or windscreen | Clean both thoroughly with glass cleaner |
| Horizontal lines | Damaged rubber edge | Replace blade if torn or nicked |
| Chattering noise | Incorrect blade angle or size | Verify correct size, adjust arm tension |
| Skipping patches | Insufficient pressure | Check arm spring tension, verify correct blade |
| Smearing in one direction | Blade installed backwards | Remove and reinstall with correct orientation |
Clean wiper blades monthly using mild soap and water to remove accumulated dirt, road film, and environmental contaminants. Wipe the rubber element gently with a damp cloth, avoiding harsh chemicals that degrade rubber compounds. Clean your windscreen simultaneously using quality glass cleaner to ensure optimal blade contact and performance.
Inspect blades every three months for signs of wear, including cracks, tears, stiffness, or deformed rubber edges. Replace blades showing visible damage immediately, as compromised rubber cannot maintain proper windscreen contact regardless of installation quality. Most blades last six to twelve months under normal Australian conditions, though harsh climates may necessitate more frequent replacement.
Pro Tip: Before winter or extended rainy periods, apply a thin coat of quality windscreen treatment to improve water beading and reduce blade workload. This preparation extends blade life while enhancing visibility during challenging weather, particularly valuable for Australian drivers facing sudden seasonal transitions.
Consult your wiper blade troubleshooting tips for model-specific guidance if problems persist after basic troubleshooting. Some vehicles require professional adjustment of wiper arm tension or alignment, particularly after accidents or component replacement. Don’t hesitate to seek expert assistance if DIY solutions fail to resolve persistent performance issues.
Explore premium wiper blades designed for your car model
Now that you’ve mastered the fitting workflow, discover high-performance wiper blades engineered specifically for Australian conditions and your vehicle. Our extensive range covers popular models like Suzuki Vitara wiper blades and Honda Civic Type R wiper blades, guaranteeing perfect fit and optimal performance.
Every blade features weather-adaptable materials that withstand Australia’s diverse climate challenges, from tropical humidity to desert heat and alpine cold. Our premium wiper blade technology delivers superior visibility, extended lifespan, and whisper-quiet operation. With free shipping Australia-wide, a 30-day money-back guarantee, and comprehensive DIY installation guides, upgrading your wiper blades has never been easier or more convenient. Browse our vehicle selector tool to find your exact match and experience the difference quality makes to your driving safety and comfort.
Frequently asked questions
What are the common signs that wiper blades need replacing?
Streaking, squeaking, skipping across the windscreen, and visible tears in the rubber indicate replacement time. Blades typically last six to twelve months depending on weather exposure and usage frequency. Replace immediately if you notice reduced visibility during rain or uneven wiping patterns.
Can I fit different types of wiper blades on my car?
Blade compatibility depends on your vehicle model and wiper arm attachment type. Some designs suit specific mechanisms like hook, pin, or bayonet connectors. Always verify specifications before purchasing, and consult wiper blade fitting instructions for your exact model to ensure proper fit.
How do weather conditions affect wiper blade performance?
UV exposure and extreme heat degrade rubber blades faster, causing cracking and reduced flexibility. Silicone blades resist weather damage better and often last longer in harsh Australian climates. Cold temperatures can stiffen rubber temporarily, reducing effectiveness until the material warms up.
Is it safe to install wiper blades myself?
Yes, DIY installation is completely safe when following proper workflow and using correct tools. The process requires no special skills or equipment beyond basic hand tools. Avoid damaging the wiper arm or windscreen by working carefully and supporting components properly throughout installation.
Recommended
- BYD Atto 3 2022-2025 Wiper Blades | GWC Wipers
- Holden Trailblaze 2016-2023 (RG) Wiper Blades | GWC Wipers
- Nissan Leaf 2010-2017 Mk1 (ZE0E) Wiper Blades | GWC Wipers
- Volvo V60 2019-2025 (Mark III) (Spray) Wiper Blades | GWC Wipers
- How Much Are Windshield Wiper Blades? 2025 Utah Buying Guide | ReVroom