
Install Prado Wipers in Under 10 Minutes for J120, 150 and J251

Most Toyota Land Cruiser Prado front and rear wiper blades can be replaced by a confident DIYer, provided you have the correct year-fit blades and follow a few safety steps. Before you touch the arms, confirm your model year and connector type using a vehicle selector or your owner’s manual, and have the right driver, passenger and rear blades on hand. Prado blades typically use hook, tab, button or side-pin connectors depending on the series, so matching the connector matters as much as the length.
TL;DR:
- Using the incorrect blade length or connector type can cause installation issues, so verifying your exact model year and series is essential before buying or fitting new blades.
- Most Prado models have a service position feature that simplifies blade replacement, but removing and refitting connector locks requires gentle handling to avoid damaging the arm or glass.
- A mismatched pair of front blades can lead to uneven wiping and faster wear, making it better to replace both blades simultaneously on the same axle.
- Rear wiper replacement is generally simpler but may involve supporting a spring-loaded arm or removing a nut, requiring caution to prevent damaging the glass or arm.
- Testing the new blades on a wet windscreen after installation helps identify and correct common issues like chatter, streaking, or misalignment before driving.
Table of Contents
- Preparation and safety before you start
- Fitting new front wiper blades step by step
- Replacing the rear wiper blade and arm
- Checking your work and fixing common problems
- Confirming the right blade for your Prado year
- Why DIY installs work, and when they don’t
- Get the perfect fit for your Prado, by year
- Sources
- FAQ
Preparation and safety before you start
Park on level ground, switch the engine off and apply the handbrake before you touch the wiper arms. Lay a folded towel or microfibre cloth along the base of the windscreen: if an arm slips from your grip, it can crack the glass rather than land softly on fabric; for more advice, see how to polish car glass safely following proper temperature limits and steps.
Most Prados have a wiper service position, activated by turning the ignition on with the wipers off, then holding the wiper switch until the arms lift away from the glass. This gives you clear access without fighting the resting tension of the arm. If your Prado does not have this feature, lift the arm by hand and hold it steady while you work rather than letting it rest under its own spring load.
Check your fitment before opening any packaging. Confirm blade lengths for the driver’s side, passenger’s side and rear separately, since some Prado trims use different front lengths depending on year and grade.
You will need:
- A clean microfibre cloth for the glass and your hands.
- The correct replacement blades for driver, passenger and rear.
- A small flat-blade tool only if your connector type needs help releasing a locking tab.
Pro Tip: Handle new blades by the plastic carrier, not the rubber edge, since skin oils can transfer onto the graphite coating and cause squeaking or chatter later.
Fitting new front wiper blades step by step
Prado arm and connector styles differ across the model’s history, which is why matching your exact series matters more than guessing from the old blade. Earlier 120-series Prados commonly used hook-style connectors, the 150-series built from 2009 to 2023 mostly carried over a similar hook or side-pin fitting depending on grade, and the newer J251 Prado from 2023 onward introduced revised arm profiles that suit a button or clip-style connector on some trims. If you are unsure which your vehicle uses, check the fitment page for your series before ordering.
Once you have the right blades, the fitting sequence is largely the same across Prado generations:
- Lift the wiper arm away from the windscreen and engage the service position if your model has one.
- Place a cloth under the arm to protect the glass in case it drops.
- Locate the connector at the tip of the arm and release it: press the locking tab for hook types, squeeze the side button for button-style connectors, or slide the small clip for tab connectors.
- Slide the old blade off the arm along its length, rather than pulling it straight out.
- Line up the new blade’s connector with the arm and slide it on until you feel or hear a firm click.
- Gently lower the arm back onto the glass instead of letting it snap down.
- Repeat on the opposite side, then test both blades together with washer fluid before driving.
A few series-specific notes are worth flagging:
- Some Prado grades fit a stabiliser bar across both front blades, which can hide the connector release point until you tilt the arm slightly.
- Some newer Prado trims have connectors that require a gentle wiggle to release them cleanly.
Change both front blades together rather than one at a time, since mechanics note a mismatched pair often causes uneven wiping and faster wear on the newer blade.
Replacing the rear wiper blade and arm
Rear wiper setups on the Prado are simpler than the fronts but still vary by connector type. Most models use a push-tab connector similar to the front, though some rear arms are secured with a small plastic cover cap hiding a retaining nut, and a handful of older variants use a bolt-on arm rather than a clip fitting.
To replace the rear blade:
- Lift the rear arm away from the glass and support it with one hand.
- Protect the rear glass with a cloth, the same as you did up front.
- Release the blade connector by pressing the tab or sliding the clip, depending on your type.
- Slide the old blade off and fit the new one until it clicks into place.
- If your rear arm has a cover cap and nut rather than a simple clip, pop the cap off carefully, note the nut’s original position before loosening it, and support the arm so it does not spring down onto the glass once the nut is free.
- Retighten the nut to its original seating rather than over-torquing, then refit the cap.
If the rear nut feels stuck, corroded, or you are not confident supporting the spring-loaded arm while it is loose, stop and have a technician handle it. A slipped arm under tension is one of the more common ways owners end up with a chipped rear window during a job that should take minutes.
Checking your work and fixing common problems
Once both new blades are fitted, run the washer fluid and let the wipers complete a full sweep on each speed setting. Testing on a clean, wet screen rather than a dry one avoids dragging grit across the glass and prematurely wearing the new rubber.
Run through this quick checklist:
- Listen for chatter or a stuttering sound across the sweep.
- Watch for any dry patch or missed strip along the blade’s full length.
- Confirm the blade sits flush against the glass at rest, not lifted at one end.
- Check that both front blades move in sync without clashing.
If you hear noise or see streaking, most causes trace back to installation rather than a faulty blade:
- A loose connector usually means the blade was not clicked fully home. Remove it and refit.
- Noise on an otherwise clean screen is often caused by residue from handling. Wipe the blade edge and glass with a fresh cloth.
- Streaking from only one blade suggests a length mismatch. Replace both fronts to the correct matched pair.
- Persistent skipping at highway speed on a Prado can be improved by choosing a beam-style or hybrid blade for better contact under wind pressure.
Pro Tip: If you notice a scratch on the glass, a bent arm, or the blade won’t sit flush no matter how many times you refit it, stop and get it checked by a technician rather than forcing the issue.
Confirming the right blade for your Prado year
Guessing a blade size from the old part is risky, since Prado trims have shifted arm styles and lengths across three decades of production. The safest approach is to use a vehicle selector tool and enter your exact year and grade rather than relying on memory or a rough measurement.
- Start at the Toyota Land Cruiser Prado wiper blades page to select your year and trim in one step.
- If your Prado falls in the 150-series range built from 2009 to 2023, that page lists the matching lengths and connector type for your generation.
- Owners of the newer J251 Prado from 2023 onward should use that page specifically, since the arm profile differs from the outgoing 150-series.
- For a longer walk-through with images, the DIY wiper install guide covers the same steps in more visual detail.
This article was checked by Faisal, a contributor covering Australian wiper fitment and installation for GWC Wipers. Every year-specific page carries a fitment guarantee, alongside a 30-day money-back guarantee and 12-month warranty on the blades themselves.
Why DIY installs work, and when they don’t
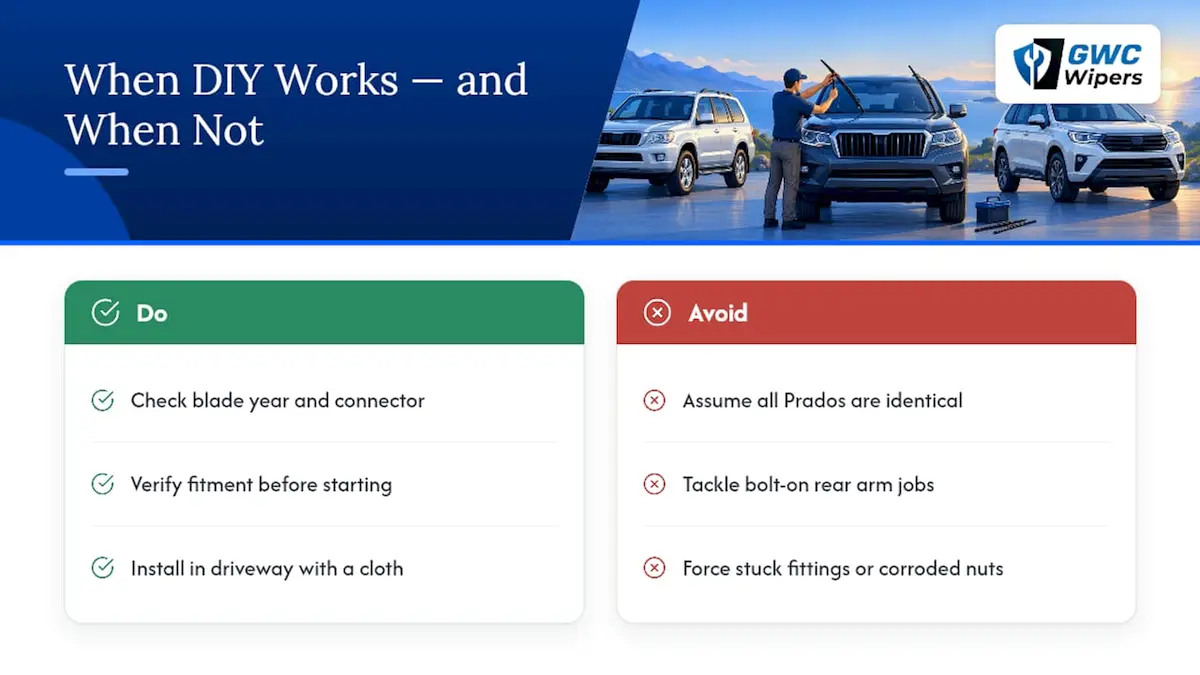
Most Prado owners can handle this job in a driveway with no tools beyond a cloth, provided the blade matches the year and connector. The part that trips people up isn’t the mechanics, it’s skipping the fitment check and assuming one Prado is the same as another across two decades of arm changes.
Where I’d draw the line is anything involving a bolt-on rear arm or a corroded nut. Forcing a stuck fitting risks the glass, and a cracked windscreen costs far more than the ten minutes you saved.
— Faisal
Get the perfect fit for your Prado, by year

Buying the wrong length or connector is the most common reason a Prado wiper install goes wrong, not the fitting itself. GWC Wipers builds its Prado range around the exact year and series rather than a generic universal fit, so the blade you order arrives with the correct connector preassembled and ready to click straight onto your arm.
- Confirm your exact fit through the Toyota Land Cruiser Prado product page before ordering.
- Every order ships free across the country, backed by a 30-day money-back guarantee and 12-month warranty.
- Natural rubber construction and segmented pressure distribution are built for Australian heat, dust and heavy rain rather than a one-size-fits-all overseas import.
Head to the Prado wiper blade range to find your Perfect Fit by year and get the job done properly the first time.
FAQ
How do you change Prado windscreen wipers?
Lift the arm into the service position, protect the glass with a cloth, release the connector at the tip of the arm, then slide the old blade off and the new one on until it clicks. Test with washer fluid afterward on both sides together.
How do you install Toyota windscreen wipers generally?
Most Toyota models, including the Prado, use a hook, tab, button or side-pin connector at the end of the arm, and the fitting sequence is the same regardless of make. Lift the arm, protect the glass, release the old blade and slide the new one on until it clicks into place.
Can you install windscreen wipers yourself?
Yes, most DIY wiper blade replacements take under 10 minutes when you have the correct blade size and connector type. The job becomes difficult only when the rear arm has a torqued nut or the blade size does not match your Prado’s year and trim.
How do you install a J hook windscreen wiper blade?
Slide the blade’s connector channel onto the curved hook at the tip of the arm and push until it locks with a click, then tug gently to confirm it is seated. This connector type is common on earlier Prado series and most other Toyota models of similar age.