DIY wiper install guide: high-performance wipers in 2026

Picture this: you’re cruising along the motorway when the sky opens up without warning. You flick on your wipers and instead of a clear view, you get streaks, chatter, and a smeared windscreen that makes every set of headlights look like a blur. It’s a scenario thousands of Australian drivers face each year, and the fix is simpler than you’d think. Replacing your wiper blades yourself takes less than 15 minutes, costs a fraction of a workshop visit, and can make a genuine difference to your safety on the road. This guide walks you through the entire DIY workflow, from gathering your tools to verifying the final result.
Table of Contents
- What you need to get started
- Step-by-step workflow for DIY installation
- Common mistakes and troubleshooting tips
- Verifying results and ongoing maintenance
- Upgrade your wiper blades with GWC Wipers Australia
- Frequently asked questions
Key Takeaways
| Point | Details |
|---|---|
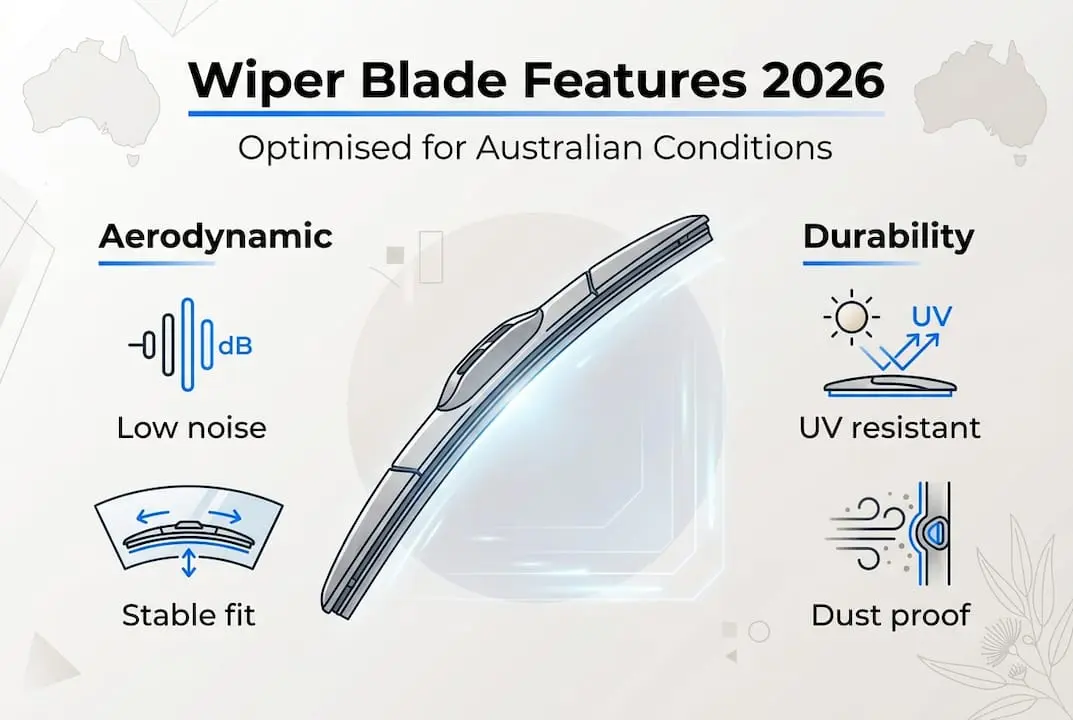
| Australian conditions matter | Harsh sun and dust can shorten wiper blade lifespan, so choose designs suited for local weather. |
| Correct sizing is crucial | Always match blade size and connector type to your vehicle’s make and model. |
| DIY saves money and time | Installing your own high-performance wipers is manageable and cost-effective with proper preparation. |
| Avoid common mistakes | Check connections, clean surfaces, and test blades to prevent streaks and noise. |
| Regular maintenance boosts safety | Monthly cleaning and yearly replacement keeps your vision clear whatever the weather throws at you. |
What you need to get started
Now that you know why routine replacement matters, let’s look at what you’ll need before starting your DIY workflow. Getting organised before you touch the wiper arm saves time and prevents frustration.
Here’s what to gather before you begin:
- New wiper blades matched to your vehicle’s make, model, and year
- Clean cloth or microfibre towel for wiping down the windscreen and arm
- Protective gloves to keep your hands clean and avoid scratching the glass
- Your vehicle owner’s manual to confirm blade sizes and any service mode requirements
- A flat-head screwdriver in case a connector tab needs gentle leverage
One of the most overlooked steps is confirming your connector type before ordering. Different connectors such as J-hook, bayonet, and pin styles are not interchangeable, and forcing the wrong type onto your wiper arm can crack the adapter or damage the arm itself. Rear wipers also need separate sizing, so don’t assume the same blade fits front and back.
It’s also worth checking whether your vehicle has a service mode. Some modern cars, particularly European and Japanese models sold in Australia, allow you to lock the wiper arms in a raised position via the ignition. This makes installation far safer and easier.
When you’re shopping, leading wiper blade brands designed for Australian conditions prioritise aerodynamic profiles and UV-resistant materials, which matter more here than in cooler climates. If you drive long distances on highways or regional roads, consider heavy-duty wipers built to handle dust, debris, and high-speed airflow.
| Connector type | Common vehicles | Key feature |
|---|---|---|
| J-hook | Most Japanese and Korean models | Universal fit, easy release |
| Bayonet | Many European vehicles | Secure lock, requires adapter |
| Pin/top lock | Select Ford and GM models | Side-pin release mechanism |
| Pinch tab | Older Australian market vehicles | Squeeze-and-slide removal |
Pro Tip: Always replace both front wiper blades at the same time. Even if one looks fine, they wear at similar rates. Replacing them together means you won’t be back under the bonnet a month later.
Before you start, use your wiper blade replacement checklist to confirm you have the right sizes for both the driver and passenger sides. These are often different lengths, so double-check rather than assume.

Step-by-step workflow for DIY installation
With your tools and materials ready, it’s time to move into the hands-on installation process. Work through each step carefully and you’ll have fresh, high-performance blades fitted in under 15 minutes.
- Activate service mode (if applicable). Check your owner’s manual to see if your vehicle supports a wiper service position. This locks the arms upright and away from the glass, giving you safe, stable access.
- Lift the wiper arms carefully. Raise each arm until it clicks into the upright position. Place a folded cloth on the windscreen beneath each arm as a precaution. If an arm snaps back without a blade attached, it can crack the glass.
- Release the old blade. Locate the connector tab where the blade meets the arm. Press or pinch the tab depending on your connector type, then slide the blade downward and away from the arm. Don’t force it.
- Prepare the new blade. Unpack your new blade and identify the correct adapter for your connector type. Most premium blades include multiple adapters in the packaging.
- Attach the new blade. Slide the connector onto the wiper arm in the direction indicated by the packaging. You should hear or feel a firm click when it’s locked in place. A blade that wobbles or feels loose is not seated correctly.
- Repeat for the passenger side. Follow the same process. Remember that blade lengths often differ between driver and passenger sides.
- Install the rear wiper separately. Rear wipers need separate sizing and often use a different connector style entirely. Refer to your manual for the correct size and removal method.
- Lower the arms gently onto the glass. Don’t let them snap down. Lower each arm by hand to avoid any impact on the windscreen.
- Run a quick test. Spray washer fluid and run the wipers through several cycles. Watch for even contact across the full sweep of the blade.
A well-fitted wiper blade should glide smoothly across the glass without lifting, skipping, or leaving dry patches. If you notice uneven contact, re-check the connector seating before assuming the blade is faulty.
For a deeper look at how blades are evaluated before they reach your vehicle, the wiper blade performance testing process covers what separates a reliable blade from a cheap one. If you drive a specific model like the Honda Civic Type R, you can find exact-fit options by selecting wipers for Civic Type R directly.
| Step | Time estimate | Difficulty |
|---|---|---|
| Activate service mode | 1 minute | Easy |
| Remove old blades | 2 to 3 minutes | Easy |
| Fit new blades | 3 to 5 minutes | Easy |
| Rear wiper replacement | 2 to 3 minutes | Easy |
| Testing and verification | 2 minutes | Easy |
Common mistakes and troubleshooting tips
Even the best workflow can be derailed by avoidable errors. Here’s how to avoid them and quickly fix issues if they arise.
The most frequent problems drivers encounter during DIY wiper installation include:
- Choosing the wrong blade size or type. Wrong size blades cause streaking, chattering, and incomplete coverage. Always verify the size in your owner’s manual or use a vehicle selector tool before purchasing.
- Forcing the connector into place. If the blade doesn’t click in smoothly, stop. Forcing it can snap the adapter or bend the wiper arm. Check that you’re using the correct adapter for your connector type.
- Skipping windscreen cleaning. Fitting new blades onto a dirty windscreen transfers grime directly onto the rubber edge, reducing performance immediately. Wipe the glass down with a clean cloth before installation.
- Not testing after installation. Skipping the test cycle means you won’t catch a loose blade or poor seating until you’re caught in a downpour. Always run the wipers before you drive.
- Ignoring the rear wiper. Many drivers replace the front blades and forget the rear entirely. The rear wiper is just as critical for reversing safely in wet conditions.
If your new blades are still streaking after installation, the issue is often residue on the glass rather than a faulty blade. Clean the windscreen with a dedicated glass cleaner and run the wipers again.
For more detailed guidance on resolving persistent issues, our heavy-duty wiper troubleshooting resource covers common causes of noise, lift, and uneven wiping specific to Australian driving conditions. You can also find practical advice on preventing streaks and noise from experienced technicians.
Pro Tip: After fitting new blades, press each one gently against the glass and slide it by hand across the windscreen. You’ll immediately feel if the rubber edge is making full, even contact or if one section is lifting.
Verifying results and ongoing maintenance
After installing the wiper blades, it’s crucial to ensure they work properly and stay in optimal condition. A quick verification routine now saves you from discovering a problem in the middle of a storm.
Run through this checklist after every installation:
- Check for clear, consistent wiping across the full arc of both front blades and the rear blade
- Listen for noise or chatter during operation, which signals poor contact or incorrect sizing
- Inspect the blade edge for any twisting or lifting at the ends, which indicates the connector isn’t fully seated
- Test at multiple speeds using your wiper speed settings to confirm performance under different conditions
- Clean the blades and glass monthly using a damp cloth to remove dust, insect residue, and road grime
Ongoing maintenance is especially important in Australia. Harsh sun accelerates wear on rubber compounds, and dust from unsealed roads can embed in the blade edge, causing micro-scratches on your windscreen over time. Aerodynamic designs with dust-repelling properties are worth the investment if you regularly drive on highways or through regional areas.
Stat callout: High-performance wiper blades engineered for Australian conditions, using UV-stabilised rubber and aerodynamic spoilers, can last significantly longer than standard blades exposed to the same sun and heat. Replacing blades every 6 to 12 months is the recommended interval, but inspect them every three months if you’re in a high-UV or high-dust region.
For a full breakdown of why staying on top of replacements protects both your visibility and your windscreen, the regular replacement benefits guide is worth reading before your next service.
Upgrade your wiper blades with GWC Wipers Australia
If you’re ready to upgrade or want even more tailored options, here’s where to explore high-performance blades for your Australian vehicle. At GWC Wipers, we’ve built Australia’s most comprehensive range of premium wiper blades, engineered specifically for the demands of our climate.
Our vehicle selector tool makes it simple to find the exact blade for your make, model, and year, with a perfect fit guaranteed. Whether you’re replacing a single blade or outfitting an entire fleet, we offer free shipping across Australia, a 30-day money-back guarantee, and a 12-month warranty on every product. Browse our full range of wiper blades Australia or explore the premium wiper technology behind our designs to understand what makes them perform better in Australian conditions. Our friendly support team is always available if you need guidance on sizing or connector types.
Frequently asked questions
How often should I replace my windshield wipers in Australia?
Replace your wipers every 6 to 12 months as a general rule. In high-UV or dusty regions, harsh sun accelerates wear on rubber compounds, so inspect blades every three months and replace sooner if you notice streaking or noise.
Can I use any type of wiper blade for my vehicle?
No. Your vehicle requires a specific connector type and blade size. Different connectors such as J-hook and bayonet styles are not interchangeable, so always check your owner’s manual or use a vehicle selector tool before purchasing.
What causes windshield wipers to make noise or streak?
Noise and streaks are most commonly caused by wrong size blades, forcing the connector during installation, or fitting new blades onto a dirty windscreen. Clean the glass thoroughly and confirm correct sizing to resolve most issues.
Is it necessary to change rear wiper blades as well?
Yes. Rear wipers need separate sizing and wear out at a similar rate to front blades. Replace both front and rear at the same time to maintain full visibility when reversing or driving in wet conditions.
Recommended
- Honda Civic Type R 2023-2026 FL5) Wiper Blades | GWC Wipers
- BYD SeaLion 6 2023-2025 Wiper Blades | GWC Wipers
- Understanding wiper blade performance testing for safer driving in 2026 | GWC Wipers
- Premium Wiper Blades for Mercedes-benz | GWC Wipers
- Rubber Car Mat Cleaner Guide 2026: Extend Mat Life 20% – Mats4U USA