
Avoid a Chipped Rear Glass: Fit the Right Rear Wiper in Australia
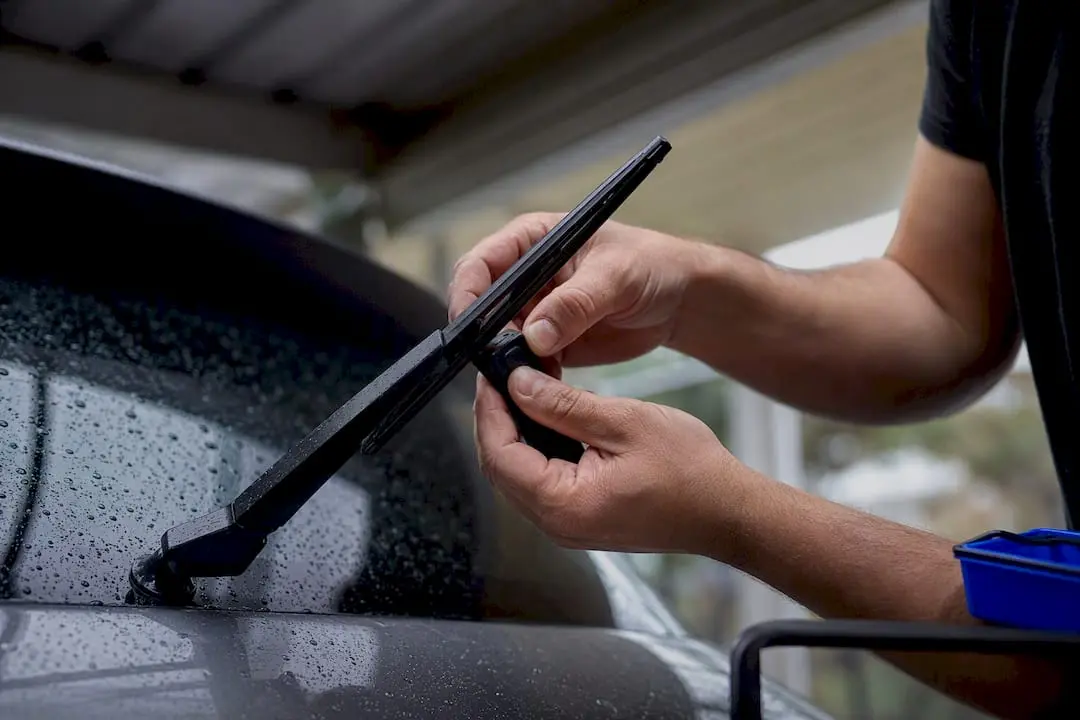
Replacing a rear wiper is one of the quickest jobs you’ll ever do on your car, and you won’t need a toolbox to manage it. The one thing that actually matters is getting a vehicle-specific blade with the correct connector, because guessing on fitment is where most DIY attempts go wrong. Once it’s clicked into place, a quick test with washer fluid confirms you’ve done it right.
TL;DR:
- Most rear wiper blades need replacement every 6 to 12 months, with outdoor parking and sun exposure accelerating rubber deterioration.
- Accurate fitment depends more on connector type than blade length, making vehicle-specific checks essential before purchase.
- Rear wiper arms often use proprietary connectors like bayonet, pin, or one-piece moulded units, requiring careful inspection to match correctly.
- Replacing the blade usually takes under five minutes and involves disconnecting the old, then clicking in the new blade while protecting the glass.
- Using a vehicle lookup tool or checking the owner’s manual ensures correct part matching, reducing the risk of damaging the glass or installing incompatible parts.
Table of Contents
- What are the signs your rear wiper needs replacing?
- How do I find out what rear wiper blade I need?
- What connector types do rear wipers use?
- How do you actually replace a rear wiper blade?
- How do you test a rear wiper after fitting it?
- How do you make a rear wiper blade last longer?
- How do Com’s tools make fitment easier?
- What the fitment obsession is really about
- Where to buy a rear blade that actually fits
- Sources
- FAQ
What are the signs your rear wiper needs replacing?
A worn rear blade rarely fails quietly. You’ll usually notice one or more of these before the blade gives up completely.
- Streaking or hazy smears across the glass, especially in light rain
- Skipping or chattering as the arm sweeps, often with a squeal
- Reduced wipe coverage, leaving dry patches at the edges of the glass
- Cracked, frayed, or brittle rubber you can feel by running a finger along the edge
- A bent or corroded arm, which stops even a new blade from sitting flush
Most of this comes down to sun exposure and age rather than mileage. As a rough guide, most maintenance guides recommend replacing rear wipers every 6 to 12 months, depending on how much direct sun and dust your car copes with. Cars parked outdoors year round will sit at the shorter end of that range.
How do I find out what rear wiper blade I need?
Rear blades are notoriously easy to get wrong, because unlike most front blades, they’re rarely one-size-fits-all. Work through these three checks in order before you buy anything.
- Check the owner’s manual first. Manufacturers list the exact rear wiper size and connector type, and it’s the most reliable source you have.
- Use a verified vehicle lookup tool. Entering your registration or make, model, and year against a proper fitment database removes the guesswork, and a quick vehicle lookup is the safest first step before you commit to a purchase.
- Measure the old blade if you’re stuck. Measure rubber tip to tip, not including the connector, and treat it as a backup method rather than your primary one.
Here’s the part that catches people out: rear wiper blades are far more likely to be vehicle-specific than front blades, because manufacturers use proprietary housings on the rear arm that front wipers rarely have. Two cars with an identical blade length can need completely different connectors. Length gets you in the ballpark; connector type is what actually determines whether the new blade will click on at all.
What connector types do rear wipers use?
Rear wiper arms tend to use a smaller family of connectors than front arms, but they’re just as fussy about fit.
- Bayonet or tab-style connectors, where the arm has a small tab that the blade clips onto directly
- Pin or rocker-style housings, common on hatchbacks and small SUVs, where the blade pivots into a slotted arm
- Push-button J-hook adaptors, less common on rear arms but occasionally used as a universal-style fitting
- One-piece moulded assemblies, where the whole wiper (arm cover and blade) is replaced as a single unit rather than a refillable blade
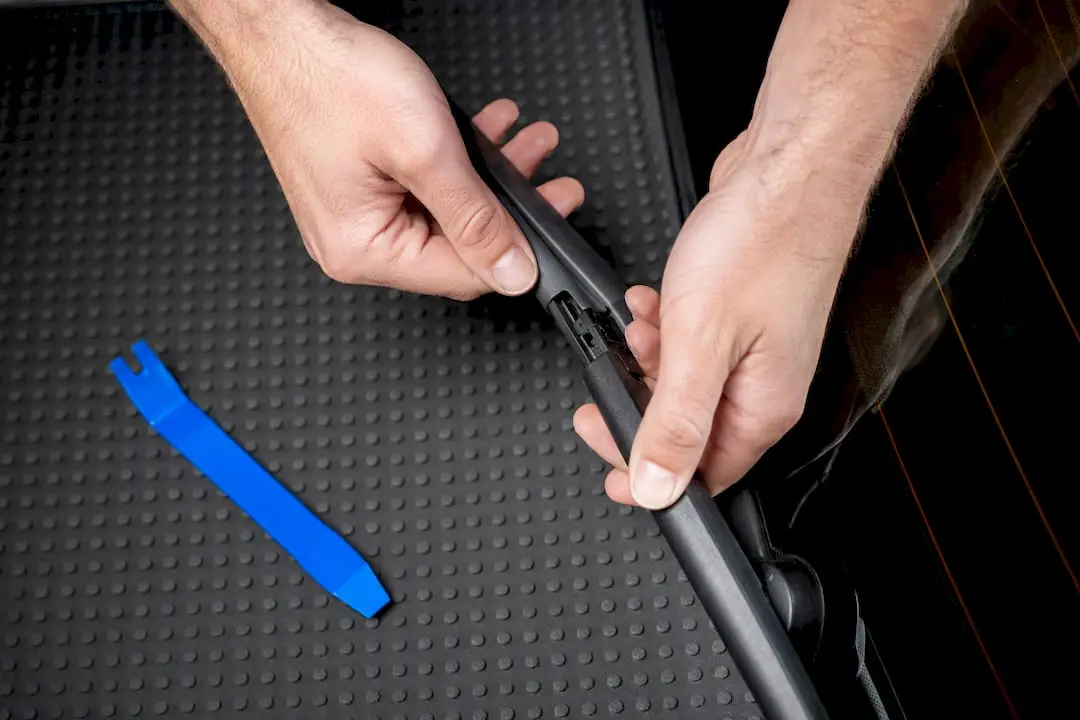
To identify yours, lift the arm gently, place a folded towel underneath to protect the glass, and look closely at how the current blade attaches before you try to remove anything. If it looks like a sealed plastic unit with no visible release lever, you’re likely dealing with a one-piece assembly rather than a refillable blade, and your replacement needs to match that exact design.
How do you actually replace a rear wiper blade?
This is where the job earns its “easy” reputation. Rear wiper replacement is a straightforward task that generally requires no specialised tools for most hatchbacks, SUVs, and crossovers, and the whole thing typically takes under five minutes once you’ve got the right part in hand. Occasionally a flathead screwdriver or pliers helps free a jammed clip, but keep them handy rather than reaching for them straight away.
Preparation
- Park on level ground and turn the ignition off, so the wiper motor can’t cycle while you’re working.
- Lay your new blade and a clean towel within reach before you touch the arm.
Removing the old blade
- Lift the wiper arm away from the glass and lay the towel underneath it for protection.
- Find the release tab or clip where the blade meets the arm, usually a small lever or button.
- Press or rotate the release as directed, then slide the old blade off the hook or pin.
Fitting the new blade
- Align the new blade’s connector with the arm exactly as the old one sat.
- Push firmly until you hear or feel a click, then give it a gentle tug to confirm it’s locked on.
- Lower the arm back onto the glass slowly, rather than letting it drop.
Never let the arm snap back onto bare glass. Guides consistently recommend protecting the glass with a towel during this step, because a metal arm hitting glass at speed can chip or crack it. Rear arm housings are also often more brittle than front ones after years in the sun, so work slowly rather than forcing anything.
Pro Tip: If the clip feels stiff on the first try, don’t force it. A quick wiggle while pressing the release almost always frees it without cracking the housing.
How do you test a rear wiper after fitting it?
Run the rear washer (or splash some water on the glass) and cycle the wiper through a full sweep. You’re checking for:
- A smooth, consistent motion across the entire glass, with no gaps
- No skipping, chattering, or squealing as the blade travels
- The blade sitting flush against the glass at rest, not lifted at one end
If you’re still getting streaks or skipping, recheck that the connector has actually clicked home and that you’ve got the correct product for your vehicle. Wipe down the glass and arm with a clean cloth first, since leftover grit can mimic a fitment problem. If the arm feels seized rather than the blade being at fault, a small amount of silicone lubricant on the pivot, left to soak for a few minutes, usually frees it without risking a snapped plastic housing.
How do you make a rear wiper blade last longer?
A little prevention goes a lot further than any product claim. Before you even fit the new blade, clean the rear glass and the arm itself, because leftover grit and old rubber residue transfer straight onto new rubber and wear it out fast. A streak-free glass cleaning method is worth using on the surrounding glass too, not just for looks but to stop grime working its way back onto the blade edge.
- Never run the wiper on dry, dusty glass. Always wet the surface first.
- Park in shade where you can. UV exposure is what dries out rubber fastest.
- When the assembly is a one-piece plastic unit, replace the whole thing rather than just the rubber insert.
Pro Tip: On most modern one-piece rear assemblies, swapping only the rubber refill leaves the blade sitting at an uneven pressure, which shortens its life. A full unit replacement gives a flatter, longer-lasting wipe.
How do Com’s tools make fitment easier?
Getting fitment right the first time is the whole game, which is why our vehicle selector tool exists: enter your make, model, and year, and it confirms the exact rear blade and connector before you buy. For trickier vehicles, our model-specific DIY guides, including our detailed SUV wiper blade change guide written by Faisal, walk through variant differences that generic guides skip. A fitment guarantee, 30-day return window, and 12-month warranty back every purchase, so getting it wrong costs you nothing but a quick exchange.
What the fitment obsession is really about
The advice you’ll find scattered across forums treats rear wiper replacement as an afterthought to the front, as if the same blade logic applies at both ends of the car. It doesn’t. Rear arms use a narrower, more proprietary set of connectors, and that’s exactly why length-based buying fails so often here. If there’s one habit worth building, it’s checking the connector before you check the price.
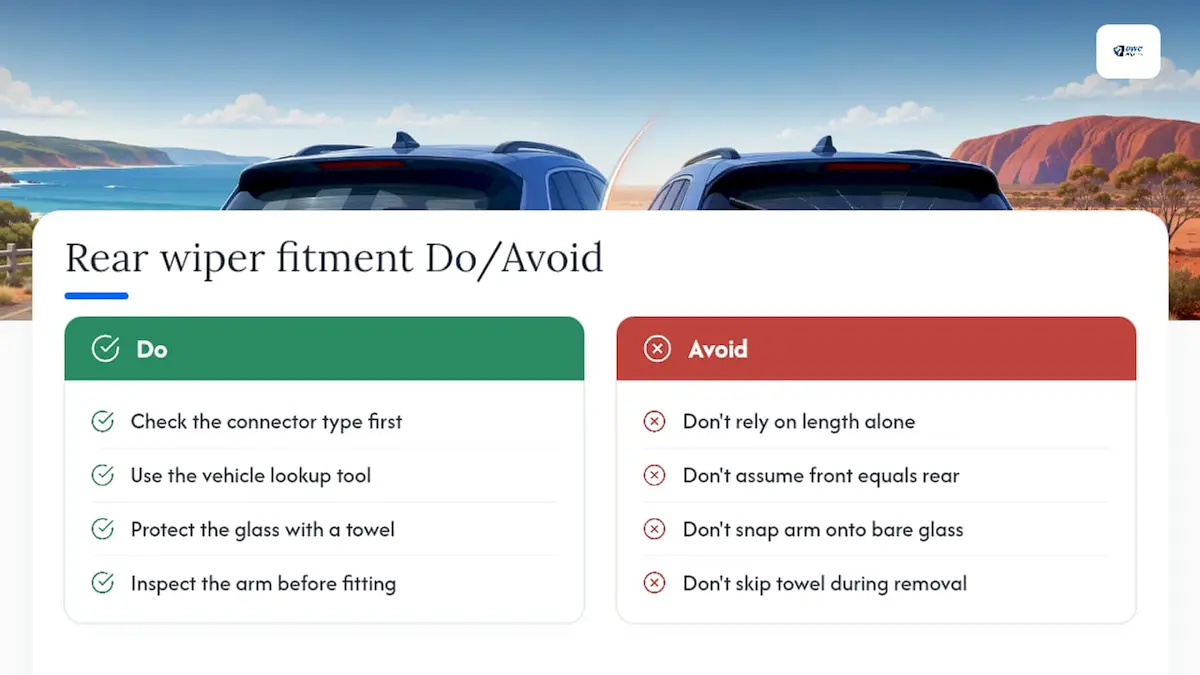
Where I think most guides undersell the risk is the removal step, not the shopping step. Everyone warns you about buying the wrong part, but fewer people warn you that a rear arm snapping onto bare glass can chip a windscreen you’ll pay far more to fix than the blade itself. That towel under the arm isn’t a nice-to-have; it’s the cheapest insurance you’ll buy all year.
If you take one thing from this guide, prioritise the lookup tool over your own measurement. A tape measure tells you length. It tells you nothing about the tab, pin, or bayonet fitting that decides whether the blade will actually click on.
— Faisal
Where to buy a rear blade that actually fits
Trawling through generic auto parts listings for a rear-specific connector wastes time you don’t have to spend. Rear wiper blades matched to your exact make, model, and year, built with natural rubber and preassembled adaptors, help ensure the click-fit step in this guide goes exactly to plan.
Every order ships free across Australia, backed by a fitment guarantee, a 30-day money-back window, and a 12-month warranty, so there’s no risk in getting the wrong connector. If you’re driving a common fitment, browse our Toyota wiper blades or check compatibility for other makes including Mercedes-Benz and Volvo. Run your ego through the vehicle selector on our full wiper blade range and confirm your exact rear fitment before you buy.
Sources
- How to replace windshield wipers — Cars24 Australia
- Wiper blade fittings explained
- How to replace rear windscreen wiper — Car Windscreen Repairs
FAQ
Is it easy to replace a rear wiper?
Yes. Most rear wiper replacements take under five minutes and need no specialised tools, though pliers can help if a clip has jammed.
How do you put together a rear wiper blade?
Align the new blade’s connector with the arm exactly as the old one sat, push until it clicks, then give it a firm tug to confirm it’s locked on before lowering the arm.
How do I find out what rear wiper blade I need?
Check your owner’s manual or use a verified vehicle lookup tool like Com’s vehicle selector, since rear blades are frequently vehicle-specific and connector type matters more than length.
How do you remove a rear windscreen wiper assembly?
Lift the arm, protect the glass with a towel, locate the release tab or clip near the connector, then press or rotate it to slide the old blade or unit free.
How often should you replace a rear wiper?
Most guides suggest replacing rear wipers every 6 to 12 months, depending on sun exposure and how often the car is parked outdoors.