
DIY car maintenance checklists: your complete monthly guide
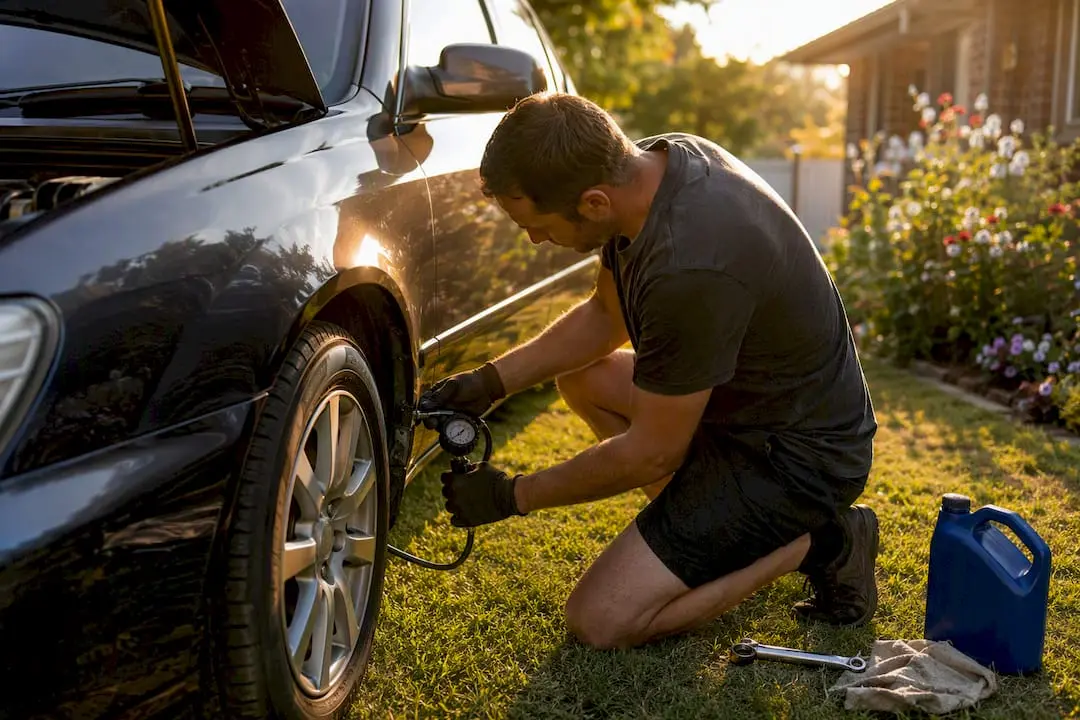
Ten essential checks keep most cars roadworthy between services: tyre pressure and tread, all lights, engine oil, coolant, brake fluid, washer fluid, wiper condition, battery terminals, and the spare tyre and jack. Run through tyres, lights and washer fluid weekly, check oil, coolant, brake fluid and battery terminals monthly, and leave belts, hoses and cabin filters for a 6-monthly look. Wiper blades and a full fluid service belong on a 12-monthly cycle. Regular basic checks prevent many breakdowns and costly repairs, according to roadside patrol data, and none of these tasks require a workshop.
Before you touch anything, throw on gloves, park on level ground with the handbrake on, and let the engine cool before opening any fluid caps. Always check your owner’s manual or logbook first. Manufacturer intervals override any general rule of thumb below, and a recognised motoring body can confirm anything your logbook doesn’t cover.
Key Takeaways
Regular, low‑cost DIY checks, tyres, fluids, lights, wipers and the battery, catch the faults that cause most preventable breakdowns and protect your car’s warranty.
| Point | Details |
|---|---|
| Run weekly and monthly checks | Cover tyres, lights and washer fluid weekly; oil, coolant, brake fluid and battery monthly. |
| Follow the logbook first | Use your owner’s manual as the authority, falling back on a 6‑month or 10,000km rule if it’s missing. |
| Know your safety limits | Leave fuel systems, brake overhauls, suspension and gearbox work to a qualified mechanic. |
| Build a seasonal calendar | Add A/C checks in summer and battery and antifreeze checks in winter to your 12‑month schedule. |
| Replace wipers annually | GWC Wipers offers model‑specific blades with preassembled adapters and a 12‑month warranty for a quick, reliable swap. |
Table of Contents
- What tools and safety gear do you need before starting?
- How often should you check your car’s fluids and tyres?
- How do you check tyres, oil, wipers and the battery yourself?
- What should your 6-month and 12-month maintenance calendar look like?
- Which car repairs should you leave to a professional?
- Sources
- FAQ
What tools and safety gear do you need before starting?
You don’t need a full workshop to run a DIY auto service checklist, but a handful of basics make the job faster and safer. Keep these in the boot permanently rather than digging them out each time.
- Digital tyre pressure gauge
- Torch or headlamp for under-bonnet work
- Small funnel for topping up fluids
- Disposable gloves and a box of rags
- Distilled water (never tap water in a battery or radiator)
- Basic multimeter or battery tester
- Wheel chocks
Park on flat, firm ground with the handbrake engaged before you check anything underneath or under the bonnet. Let the engine cool for at least 30 minutes before opening a coolant cap. Hot coolant is pressurised and can scald you badly if released suddenly. If you’re doing any electrical work beyond checking terminals, disconnect the battery negative terminal first and reconnect it last. That single habit prevents the short circuits that cause most DIY electrical mishaps.
Pro Tip: Keep a second, smaller kit permanently in the car: a torch, gloves, a tyre gauge and a litre of screen wash. You’ll use it more often for a roadside top-up than you’d expect, and it means you’re never caught out on a road trip.
Roadside assistance data consistently shows that a handful of quick checks, oil, coolant, battery, lights and washers, heads off a large share of avoidable breakdowns before they happen.
How often should you check your car’s fluids and tyres?
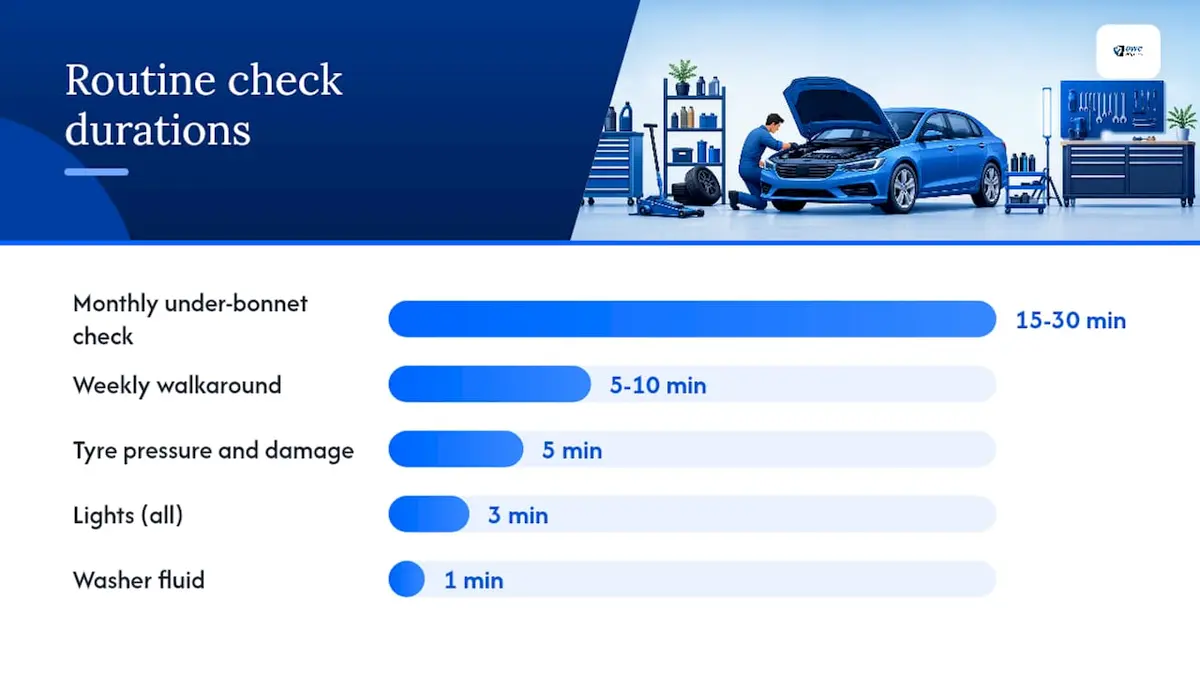
Two simple routines cover most of what a car needs between logbook services: a five to ten minute weekly walkaround, and a fifteen to thirty minute monthly check under the bonnet. Neither requires tools you don’t already own.
Weekly walkaround (5 to 10 minutes)
- Walk around the car and check all four tyres for visible damage, bulges or embedded objects.
- Check tyre pressure against the figure on the driver’s door sticker, not the tyre sidewall.
- Test headlights, indicators, brake lights and reversing lights with a second person or by reversing near a wall.
- Top up washer fluid if the reservoir is under half full.
- Look under the car briefly for fresh fluid spots on the ground.
Monthly under-bonnet check (15 to 30 minutes)
- Check engine oil level with the dipstick on cool, level ground.
- Check coolant level in the overflow reservoir (never the radiator cap when hot).
- Check brake fluid level against the min/max lines on the reservoir.
- Inspect battery terminals for white or greenish corrosion buildup.
- Note any dashboard warning lights that have appeared since last month.
Tyre pressure matters more before long trips than most drivers realise, since a fully loaded car needs different pressure than a solo commute. Check it monthly at minimum, and always before a long drive. A monthly routine of tyre checks, fluid checks and a wash, plus one seasonal task, meaningfully cuts the odds of an unexpected repair bill.
Pro Tip: Log every check in your phone’s notes app with the date and odometer reading. When something does go wrong, that history tells a mechanic exactly what’s already been ruled out, saving you a diagnostic fee.
| Check | Frequency | Time needed |
|---|---|---|
| Tyre pressure and damage | Weekly / before long trips | 5 minutes |
| Lights (all) | Weekly | 3 minutes |
| Washer fluid | Weekly | 1 minute |
| Engine oil level | Monthly | 5 minutes |
| Coolant and brake fluid | Monthly | 5 minutes |
| Battery terminals | Monthly | 5 minutes |
If a warning light stays on after a reset, or a fluid drops noticeably between checks, that’s your cue to book a mechanic rather than keep topping it up.
How do you check tyres, oil, wipers and the battery yourself?
These five tasks cover most of what a confident DIYer can safely do at home. Work through them in order and you’ll cover the checks that catch the majority of preventable faults.
1. Check tyre pressure and tread depth
Find your car’s recommended pressure on the sticker inside the driver’s door frame or in the owner’s manual, not on the tyre itself. Unscrew the valve cap, press the gauge firmly onto the valve until the hissing stops, and read the result. Adjust when the tyres are cold, ideally before you’ve driven more than a couple of kilometres. For tread, use the built-in wear indicators moulded into the tyre grooves, or the 20 cent coin test: insert a coin into the tread groove and if you can see the rim of the coin, the tread is getting low. The legal minimum tread depth is 1.5 millimetres across the tyre. Check for cuts, bulges and embedded stones at the same time.
2. Check the engine oil level
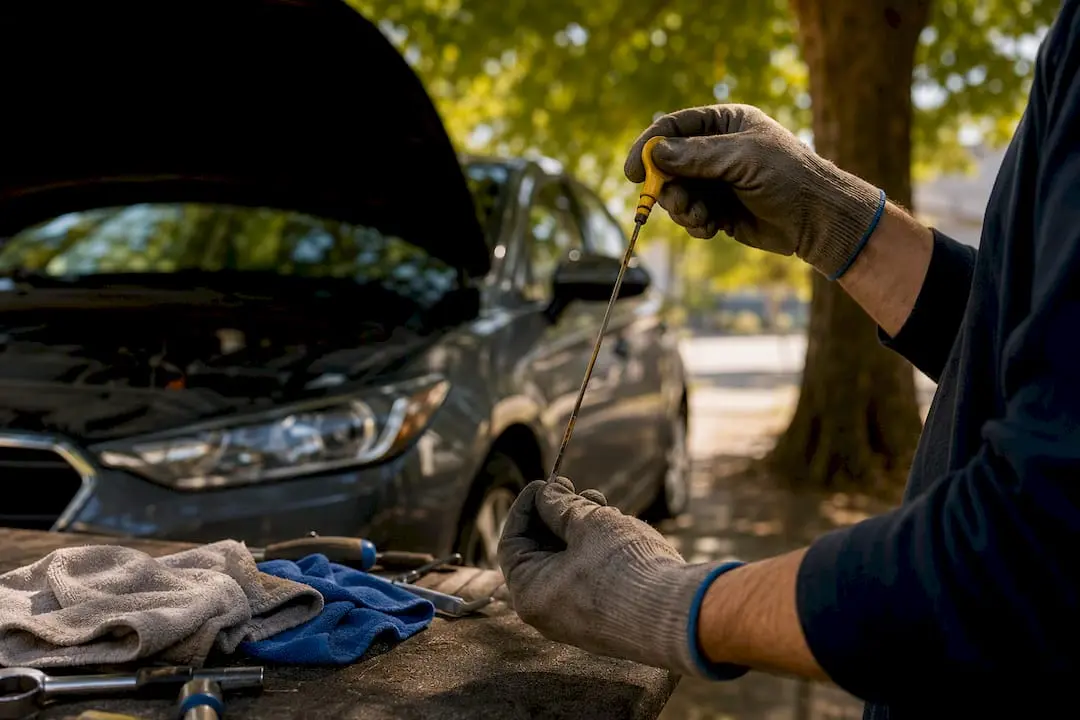
Park on level ground and wait at least five minutes after switching off so oil drains back into the sump. Pull the dipstick, wipe it clean with a rag, reinsert it fully, then pull it out again to read the level. Oil should sit between the min and max marks. Amber or honey coloured oil is healthy; very dark oil suggests it’s due for a change, and a milky or frothy appearance means coolant has likely mixed in, which is a workshop job, not a top-up.
3. Replace windscreen wiper blades
Lift the wiper arm away from the glass, locate the small tab or clip where the blade meets the arm, and squeeze or slide it to release the old blade. Slide the new blade on until it clicks into place, then lower the arm gently back onto the glass. Do this once a year as a rule of thumb, since environmental exposure wears blades down over time even if they look fine.
4. Clean battery terminals
Disconnect the negative terminal first, then the positive. Mix a tablespoon of bicarbonate of soda with a cup of distilled water and scrub the corroded terminals with an old toothbrush. Rinse with a small amount of clean distilled water and dry thoroughly before reconnecting, positive first this time. Skip this entirely on a sealed or maintenance-free battery unless the case specifically permits terminal access.
5. Check coolant, brake and washer fluid
Check coolant level only in the plastic overflow tank, and only when the engine is completely cool. Never open the radiator cap on a hot engine; pressurised coolant can spray out violently. Brake fluid should sit between the min and max lines on its translucent reservoir, and a level that’s dropped noticeably without a top-up usually points to worn pads or a leak, which means a workshop visit rather than a DIY fix.
Pro Tip: If your washer fluid smells sweet or the bonnet has a haze after driving, that’s often coolant, not washer fluid, leaking somewhere. Get it checked before it becomes an overheating problem.
What should your 6-month and 12-month maintenance calendar look like?
Spacing your DIY auto service guide across the year stops any single month from becoming an overwhelming list of jobs. A simple calendar with one seasonal task each month makes owners far more likely to actually complete the checks that prevent expensive repairs.
| Interval | Tasks |
|---|---|
| Every 6 months | Top up all fluids, rotate tyres if due, test battery and charging system, check cabin and engine air filters |
| Every 12 months | Replace wiper blades, follow logbook service or book a full service, check timing belt schedule against manual |
| Summer | Test air conditioning performance, check coolant strength and hose condition before heat stress |
| Winter | Test battery cranking power, top up washer fluid with antifreeze‑rated fluid, check demister function |
| Before a long trip | Full walkaround, spare tyre pressure, jack and tools present, all fluids topped up |
If you can’t locate your logbook, a general rule of thumb is a service every six months or 10,000 kilometres, whichever comes first, with the basic monthly checks filling the gaps between. Cabin air filters are easy to overlook but worth adding to the 6-monthly list: a clogged filter reduces airflow and can leave your demister struggling exactly when you need it most in cold weather. If you’re heading into winter, our winter car care checklist covers the extra steps worth adding to this calendar.
Pro Tip: Set four recurring phone reminders right now, one per season, rather than trying to remember a full 12-month calendar in your head. You’ll actually follow through on the seasonal tasks instead of forgetting them until something fails.
Which car repairs should you leave to a professional?
Not every job belongs on a DIY checklist, and knowing where that line sits protects both you and your car. Some systems carry real safety risk if handled without the right training or equipment.
- Fuel system work of any kind, including injector or pump repairs
- Brake work beyond a basic fluid level check, especially pad and disc replacement or bleeding lines
- Air conditioning degassing or refrigerant handling
- Suspension strip-down or component replacement
- Clutch or gearbox internal repairs
- Advanced diagnostic fault-finding using dealer-level scan tools
Overheating, heavy smoke from the exhaust, milk-coloured oil, brake pedal fade, a large fluid puddle under the car, or unusual steering and suspension behaviour are not DIY territory. Any one of these warrants an immediate trip to a qualified mechanic, not a wait-and-see approach.
Sticking to your manufacturer’s logbook service schedule rather than skipping intervals also protects your warranty and resale value, even for the jobs you’re confident handling yourself.
Pro Tip: If you’re ever unsure whether a job is DIY-safe, treat that uncertainty as your answer. A $150 diagnostic fee is cheaper than a mistake on your brake lines.
Getting the most out of your wiper checklist
Wiper blades wear out faster than most drivers expect because UV exposure, road grit and temperature swings all degrade the rubber edge, often within 12 months even without visible damage. Streaking, chattering across the glass, or skipped patches are your cue to replace them immediately rather than waiting for the annual mark. Our guide on why wipers streak and how to fix it walks through the common causes if you’re troubleshooting before you buy.
Choosing the right blade comes down to three things: exact fitment for your make, model and year, the rubber compound (natural rubber tends to outlast cheaper synthetic blends in harsh sun), and an aerodynamic profile that keeps the blade pressed evenly against the glass at highway speed.
- Confirm your vehicle’s wiper size and connector type using a model-specific fitment tool.
- Lift the old blade away from the glass and release it from the arm at the clip or tab.
- Attach the correctly sized adapter to the new blade if it doesn’t already match your arm type.
- Slide the new blade onto the arm until it clicks securely into place.
- Lower the arm gently and test with the washer fluid running.
- Park under cover where possible to reduce UV exposure
- Lift blades off the glass during extreme heat to stop the rubber baking against hot glass
- Avoid petrol-based cleaners on the rubber edge, which dry it out fast
| Wiper task | What to check | How often |
|---|---|---|
| Streak test | Run washers and watch for skipping or smearing | Weekly |
| Rubber condition | Feel for cracking or hardened edges | Monthly |
| Full replacement | Swap both blades regardless of which one shows wear | 12 months |
A technician’s note on realistic DIY expectations
The biggest mistake I see isn’t skipped maintenance, it’s rushing a job you’ve never done before without reading the steps twice first. Give yourself double the time you think a task will take, especially the first time you do it. Everything in this guide is genuinely achievable in an afternoon with basic tools, but the owner’s manual and your own safety always come before any checklist, including this one.
Where quality wiper blades fit into your maintenance routine
Since you’ll be replacing wipers roughly once a year anyway, it’s worth sourcing blades built to handle the conditions your car actually deals with rather than a generic one-size-fits-all pack from a servo shelf. GWC Wipers designs blades with preassembled adapters, so the fitment step in the install walkthrough above is already sorted before the blade arrives.
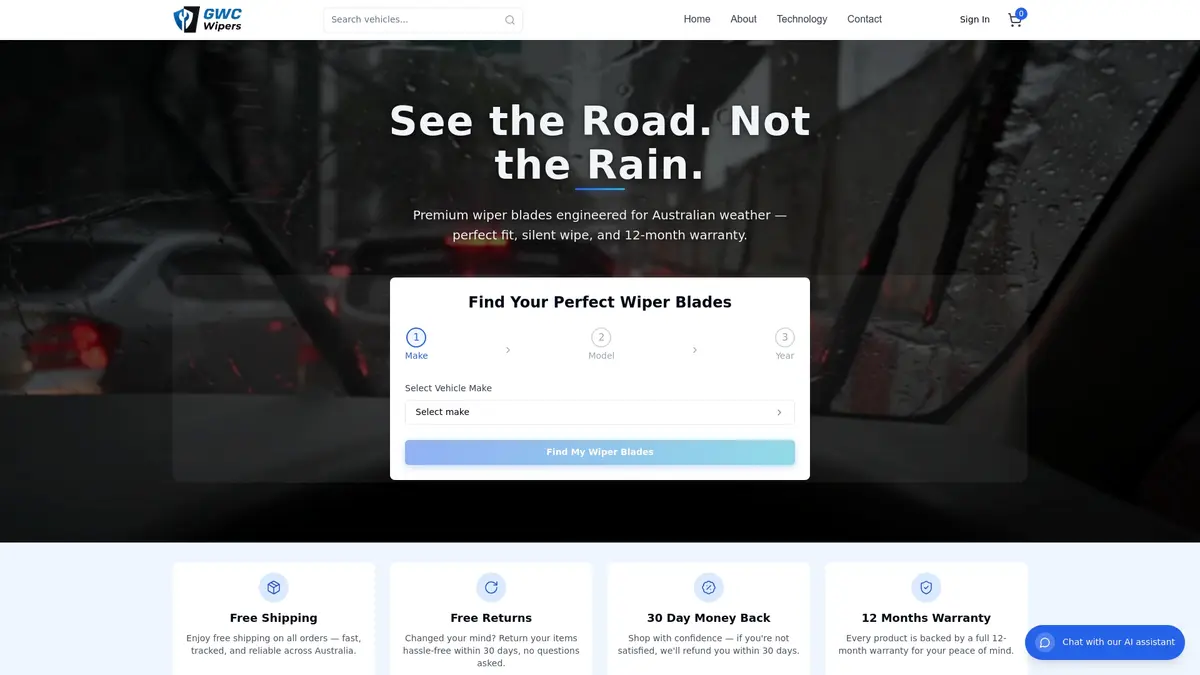
Every blade is matched to over 2,500 specific makes, models and years, backed by a 12-month warranty and a 30-day money-back guarantee if the fit or performance isn’t right. Shipping is free across the country, and detailed model-specific fitting guides sit alongside every product page so the five-minute swap described earlier goes exactly to plan. If your car’s due for its annual change, browse wiper blades for Toyota or search your own vehicle through the site’s selector tool to find your exact match and get it moving before the next storm rolls in.
Sources
- How to do a basic car check | RAC
- Maintaining your car | Consumer Affairs Victoria
- A beginner’s car maintenance checklist and servicing guide | AAMI
- Your 12-month vehicle care calendar | Shell Australia
- Maintain your vehicle | Transport WA
FAQ
How often should I do a DIY car maintenance check?
Run a five to ten minute walkaround weekly for tyres, lights and washer fluid, and a fifteen to thirty minute check monthly for oil, coolant, brake fluid and battery terminals.
What’s the minimum legal tyre tread depth?
The minimum legal tyre tread depth is 1.5 millimetres across the tyre surface, checked using the built-in wear indicators or a coin test.
How often should I replace windscreen wiper blades?
Replace wiper blades at least every 12 months, or sooner if you notice streaking, chattering or skipped patches on the glass. GWC Wipers’ model‑specific blades come with preassembled adapters that make the annual swap a five‑minute job.
Can I check my car’s oil and fluids without any mechanical experience?
Yes. Checking oil, coolant, brake fluid and washer fluid levels requires no mechanical skill, just a cool engine, level ground and the dipstick or reservoir markings as your guide.
What car problems should I never attempt to fix myself?
Fuel system repairs, brake pad or disc replacement, air conditioning degassing, suspension strip-down and gearbox internal work all require a qualified mechanic due to safety and equipment requirements.