
Streaky wipers after a blade change? Fix it in minutes
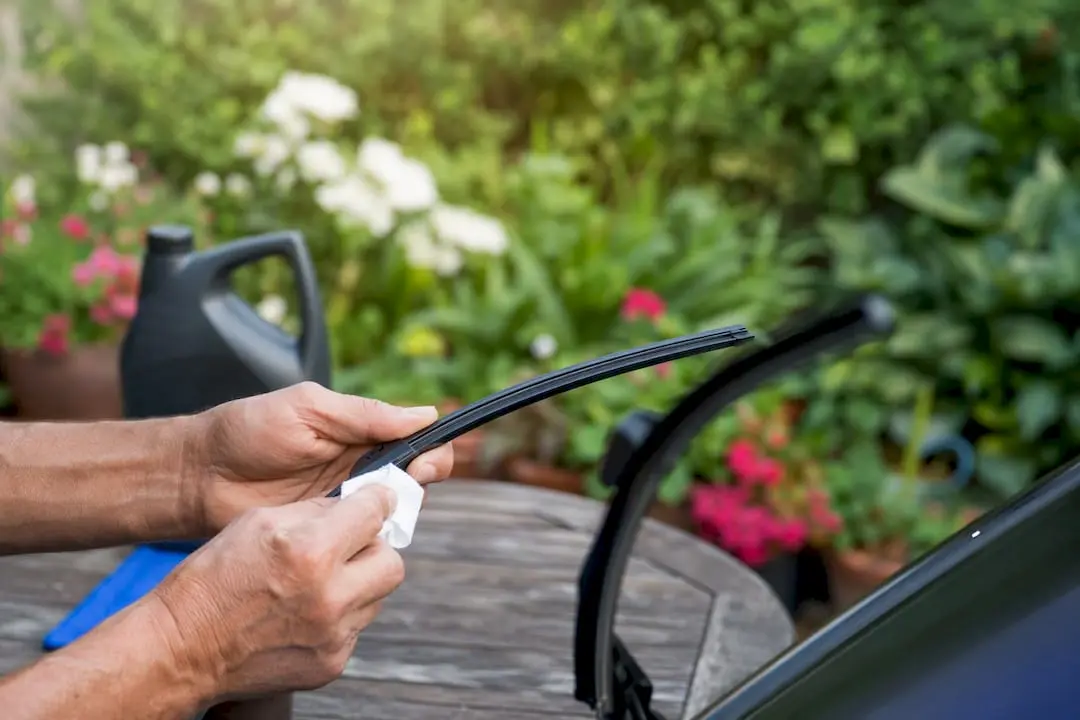
If new blades still leave streaks, it’s usually contamination, incorrect fitment, washer fluid or arm contact. Test all three before you assume the blades themselves are faulty. Grime or wax left on the rubber or the glass is one of the most common causes of new-blade streaking, and it’s often an easy fix rather than a product problem.
Here’s what to check right now:
- Clean the blade and the windscreen. Wipe the rubber edge with a microfibre cloth and warm soapy water, then clean the glass with an ammonia-free cleaner to remove wax and film.
- Check your washer fluid. Old or contaminated fluid can smear rather than clear, so drain and refill if it looks cloudy or has been sitting for months.
- Confirm the blade is seated properly. A blade that hasn’t clicked into place will chatter and skip instead of gliding evenly across the glass.
If you’ve worked through all three and the streaking continues, the issue is more likely mechanical, and it’s worth exploring replacement options like those from Com, which are built specifically for consistent, all-weather contact.
Key Takeaways
Streaking after a blade change is almost always contamination, poor fitment, or old washer fluid, and it’s fixed in minutes without buying anything new.
| Point | Details |
|---|---|
| Clean before you replace | Wipe the blade and windscreen with the right products before assuming the blade is faulty. |
| Test fitment with a tug | A properly seated blade won’t shift when tugged gently after clicking into place. |
| Watch for mechanical faults | Worn rubber, a bent frame, or a binding pivot need repair or replacement, not more cleaning. |
| Treat rust before it spreads | Sand or use a rust remover, then seal with primer and paint to stop corrosion returning. |
| Buy the right fit from Com | Use the vehicle selector for guaranteed fitment, backed by a 30-day money-back guarantee and 12-month warranty. |
Table of Contents
- Rust on wiper arms fix: five checks before you buy new blades
- How do you fit new wiper blades correctly?
- Why do wiper blades still streak after cleaning and refitting?
- What causes rust on wiper arms and how do you remove it?
- How do you stop rust from coming back on wiper arms?
- When does rust mean it’s time to replace the wiper arm?
- What tools do you need to fix rust on a wiper arm?
- Simple maintenance habits stop repeat problems
- Need new blades? Here’s the fastest way to get the right ones
- Sources
- FAQ
Rust on wiper arms fix: five checks before you buy new blades
Most streaking problems get solved with cleaning and adjustment, not a fresh set of blades. Work through these five checks in order. Each one takes only a few minutes and tells you something different about where the problem sits.
- Clean the rubber blade properly. Use a microfibre cloth dampened with warm soapy water or an isopropyl alcohol solution, and wipe from one end of the blade to the other rather than scrubbing in circles. This lifts the fine layer of road grime that builds up even on brand new rubber during transport and shelf storage.
- Clean the windscreen, not just the blade. Wax from a recent car wash, sap, and oily traffic film sit on glass and get picked up by even a perfect blade. HowToGeek’s testing on new-blade streaking found this contamination is one of the most overlooked causes of poor wiping after a blade swap. An ammonia-free glass cleaner and a dry microfibre towel usually clear it in one pass.
- Check your washer fluid. Fluid that’s old, diluted with dirty tap water, or contaminated with insect residue can leave a greasy film that the blade just drags around the glass.
- Verify the blade is installed correctly. Clip and hook style connectors need a firm click before they’re seated. Give the blade a gentle tug once fitted. It shouldn’t move, and it should sit flush and parallel to the arm.
- Check arm tension and pivot movement. Lift the arm off the glass and let it drop from around 15 centimetres. It should fall with even spring pressure across its whole length. A weak spring or a sticky pivot point means the blade isn’t pressing evenly, no matter how new it is.
Pro Tip: Do the tug test with the engine off and the wipers in the service position. It only takes a few seconds, and it catches most mis-seated blades before you’ve even driven the car out of the driveway.
How do you fit new wiper blades correctly?
Getting the fit right the first time avoids half the streaking complaints Com hears from customers who’ve just installed replacements. The process is simple, but skipping steps is where most DIY fits go wrong.
Start with confirmation, not guesswork:
- Confirm the correct blade length and connector type for your specific make, model and year, using your owner’s manual or a vehicle selector tool. Getting this wrong is the single biggest cause of poor fitment.
- Decide between beam-style and conventional blades if your vehicle allows either. Beam blades typically distribute pressure more evenly across curved windscreens, which Natrad’s fitment guide notes can reduce streaking on modern vehicle glass compared to traditional frame blades.
- Lift the wiper arm away from the glass and lay a towel over the windscreen edge to protect the paint and glass from scratches.
- Release the old blade using whatever fitting your vehicle uses. Hook fittings usually need a small tab pressed while sliding the blade down the arm. Pin and bayonet fittings release with a squeeze-and-slide motion.
- Slide the new blade’s adapter onto the arm until you hear or feel it click into place.
Once it’s fitted, don’t skip the final checks:
- Give the blade a firm tug test. It should not move or wobble.
- Lower the arm gently back onto the glass. Never let it snap down, as this can crack the blade’s spine or chip the windscreen.
- Run the washer jets and test a full sweep cycle, watching for chatter, skipping, or an uneven line of missed glass.
- If one side streaks but the other doesn’t, recheck that specific blade’s seating. It’s rarely a coincidence.
A blade that ticks all four boxes should give you a clean, quiet, streak-free sweep from edge to edge. If you’re working across a fleet or multiple vehicles, a step-by-step fitment guide for various models is worth bookmarking.
Why do wiper blades still streak after cleaning and refitting?
When cleaning, refilling washer fluid, and refitting haven’t solved it, the cause is usually mechanical rather than cosmetic. Here’s what to rule out next:
- Wax, rain repellents, or oily film on the glass. These build a surface the blade can’t grip evenly. A glass polish or dedicated water-spot and residue remover can restore a clean surface where regular cleaning hasn’t cut through it.
- Worn rubber versus a damaged frame. Cracked, hardened, or glazed rubber needs replacing outright. A bent frame or connector, on the other hand, can sometimes be straightened, but it’s rarely worth the effort compared to a new blade.
- A binding pivot or weak tension spring. If the arm doesn’t spring back evenly when lifted and dropped, the pivot mechanism itself may be the fault, not the blade.
Repair guides consistently point to three mechanical causes behind persistent streaking: worn rubber, a damaged blade frame, or a binding arm pivot, and each one calls for a different fix. Worn rubber means a new blade. A damaged frame usually means the same. A binding pivot is the one case where the blade isn’t actually the problem at all, and no amount of cleaning or refitting will solve it.
New blades sometimes fail simply because the wrong type was fitted for the vehicle’s windscreen curve. If you’ve checked contamination, fluid, fitment and arm movement and you’re still seeing streaks, Signs it is time to replace wiper blades recommends checking every six to twelve months as a baseline, sooner if you’re seeing cracking, chatter or squeaking alongside the streaks.
What causes rust on wiper arms and how do you remove it?
Rust on a wiper arm usually starts at the pivot base or the joint where the arm meets the spindle nut, where moisture sits and the factory coating wears thin over time. Left alone, surface rust spreads into pitting, which throws off how evenly the arm presses the blade against the glass, and that’s often the real reason streaking returns even after a fresh blade goes on.
Light surface rust responds well to fine-grit sandpaper, roughly 400 to 600 grit, worked gently along the metal until you reach clean, bare metal underneath. Wipe away the dust with a dry cloth before moving to the next step, since leftover grit will interfere with anything you apply afterwards.
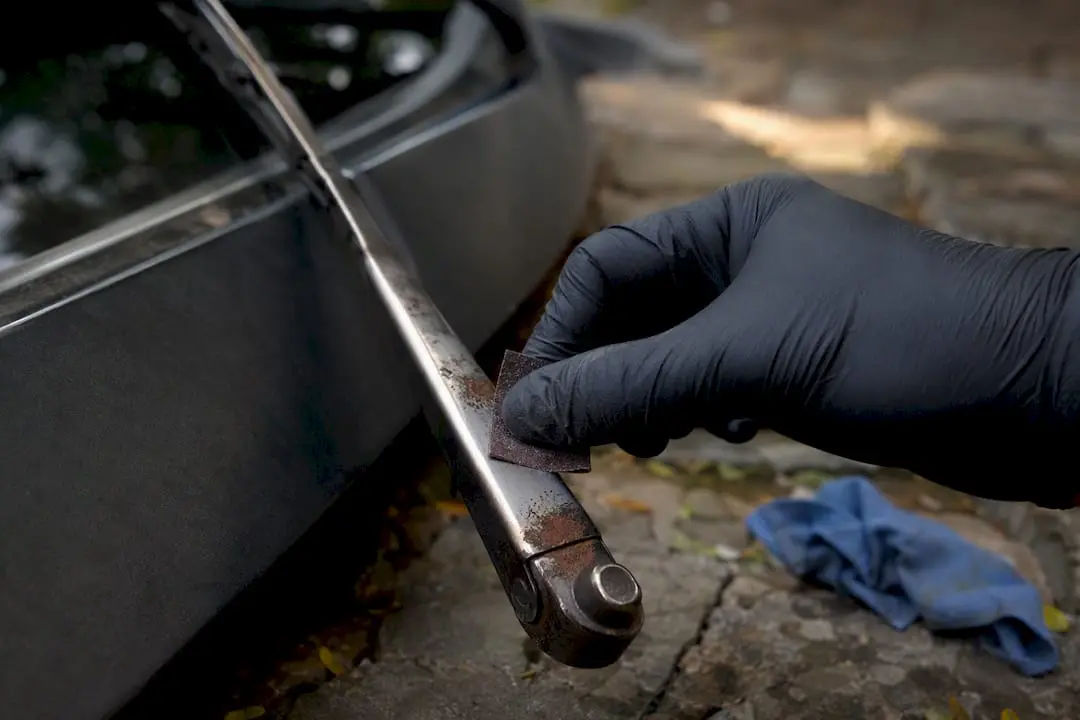
For rust that’s gone beyond a light dusting, a dedicated rust remover solution or gel designed for automotive metal works faster than sanding alone and reaches into pitted areas sanding can miss. Avoid soaking any plastic clips, adapters or the blade itself in these solutions, as most rust treatments are formulated for bare metal only.
Whichever method you use, dry the arm completely before it goes back into service. Rust remover residue left damp under a fresh coat of paint or primer is one of the fastest ways to see the same corrosion return within a season.
How do you stop rust from coming back on wiper arms?
A treated arm without a protective layer over the top will rust again, often within months, especially in a climate with heavy rain, coastal salt air, or big swings between hot and cold. Once the arm is sanded, treated and completely dry, the next step is sealing that bare metal before it’s exposed to weather again.
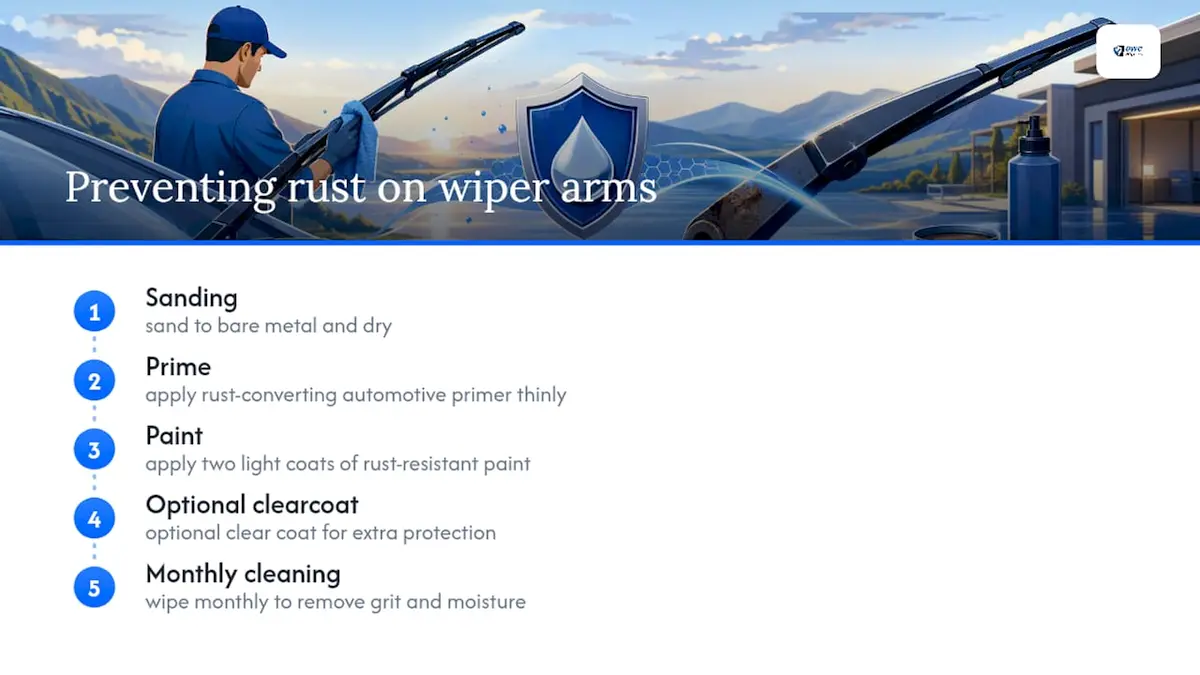
A rust converting primer designed for automotive use is the right starting point. It chemically bonds with any remaining trace rust and creates a stable surface for paint to adhere to, rather than sitting on top of metal that’s still reactive. Apply it in thin, even coats and let it cure fully according to the product’s timing, usually a few hours, before moving on.
Once primed, a rust-resistant automotive touch-up paint or a specialist metal spray paint in a matching or matte black finish gives the arm a durable topcoat. Two light coats generally outperform one heavy coat, since thick paint is more prone to chipping at the pivot point where the arm flexes constantly.
Some owners finish with a clear coat sealant over the paint for extra protection, particularly if the vehicle is parked outdoors or near the coast. It’s an optional step, but it adds a barrier against the exact conditions that caused the original corrosion.
None of this replaces regular cleaning. A monthly quick wipe of the blade and arm area removes the grit and moisture that accelerates rust in the first place, so the coating you’ve just applied actually lasts.
When does rust mean it’s time to replace the wiper arm?
Not every rusty arm can be saved with sanding and paint, and knowing the difference saves you from redoing the same job twice. Surface rust that hasn’t pitted the metal is almost always treatable. Rust that has eaten into the arm and created visible holes, flaking layers, or a rough, crumbling texture is a different problem entirely.
Check the pivot joint and the point where the arm connects to the spindle nut first, since these are the highest stress points and the first to fail structurally. If the arm feels loose, wobbles side to side, or doesn’t hold consistent spring tension after you’ve addressed rust on the surface, the corrosion has likely already compromised the metal underneath, not just the coating on top.
A bent or rust weakened arm will never hold a new blade flat against the glass, no matter how good the blade is. If you’ve fitted a correctly sized replacement blade and you’re still seeing uneven contact, skipping, or one side of the sweep missing glass entirely, the arm itself is the more likely culprit rather than the blade.
Arms with rust around the wiring harness clip, on vehicles with heated wiper systems, need extra caution, since corrosion there can affect the electrical connection as well as the mechanical fit. In that case, a technician’s inspection is worth the cost before you spend more time on DIY treatment.
What tools do you need to fix rust on a wiper arm?
A basic rust repair kit for wiper arms doesn’t need to be elaborate, but having the right items on hand before you start saves a lot of back and forth to the hardware store.
For the removal stage, you’ll want fine grit sandpaper (400 to 600 grit), a wire brush for stubborn pitted spots, a rust remover solution or gel rated for automotive metal, and a microfibre or lint free cloth for wiping down dust and residue. Safety glasses and disposable gloves are worth using throughout, since rust particles and remover chemicals can irritate skin and eyes.
For the protection stage, add a rust converting primer, a matching automotive touch up paint or metal spray paint, and painter’s tape to mask off the blade clip, adapter, and any plastic trim near the arm so overspray doesn’t damage them. A small artist’s brush gives more control than a spray can around the tight pivot area.
Set aside a flat, ventilated workspace, ideally outdoors or in a well aired garage, since both rust remover fumes and spray paint need airflow to cure properly. Budget for drying and curing time between each stage rather than rushing straight through, since paint applied over damp primer or wet metal is far more likely to peel or flake within weeks.
Simple maintenance habits stop repeat problems
Most of the streaking and rust issues we see traced back to one thing: nobody checked the wipers for months. A quick inspection every six months catches wear before it becomes a real problem, and replacing blades every 6 to 12 months depending on your climate keeps performance consistent rather than reactive.
Using a proper vehicle selector before buying avoids the incorrect sizing that causes half these fitment complaints in the first place, and a fitment guarantee takes the guesswork out of ordering online. A 30 second monthly wipe of the blade edge, done while you’re already at the bowser or the driveway, is honestly the cheapest insurance you’ll ever buy for your windscreen.
Need new blades? Here’s the fastest way to get the right ones
If you’ve worked through the cleaning, fitment and arm checks and the streaking still hasn’t cleared, the blade itself is the more likely cause, and that’s exactly where Com comes in. Rather than guessing at a size off a shelf, Com’s vehicle selector tool matches your make, model and year to the correct fitment across more than 2,500 vehicles, so you order once and get it right.

Every set ships with a fitment guarantee, backed by a 30-day money-back guarantee and a 12-month warranty, so there’s no risk in trying a set built for genuine all-weather performance rather than a generic universal fit. If you drive a Mercedes-Benz, browse the GLE-Class, GLB-Class or GLA-Class pages directly, or start from the full range of makes to find yours. Free shipping is included Australia-wide, and detailed DIY installation guides walk you through fitting once your new blades arrive. If you’re still not sure which blade suits your vehicle or your climate, reach out to the support team before you order rather than after.
Sources
- Why brand-new wiper blades can leave worse streaks than the ones you just replaced
- Signs it is time to replace wiper blades | Kalamunda Toyota
- A guide to picking the right windscreen wiper blades | Natrad
- Windshield wiper streaks — 3 common causes — Ricks Free Auto Repair Advice
FAQ
Why do new wiper blades still streak?
Grime, wax or oily film on the blade or windscreen is the most common cause, and cleaning both surfaces usually fixes the issue within minutes.
How often should I replace my wiper blades?
Check them every six months and replace regularly every year or so, or sooner if you notice cracking, chatter, squeaking or streaking.
Can rust on a wiper arm be fixed without replacing it?
Light surface rust can be sanded or treated with an automotive rust remover, then sealed with a rust converting primer and paint. Pitted or structurally weakened metal usually needs the arm replaced.
How do I know if it’s the blade or the arm causing streaks?
If a correctly fitted, correctly sized blade still skips or leaves an uneven sweep, a binding pivot or damaged frame is more likely than the blade itself.
What’s the easiest way to buy the right replacement blades?
Use a vehicle selector tool matched to your make, model and year. Com’s tool covers over 2,500 vehicles and ships with a fitment guarantee, a 30-day money-back guarantee and a 12-month warranty.