
Wiper park position fix: how to reset and realign your blades
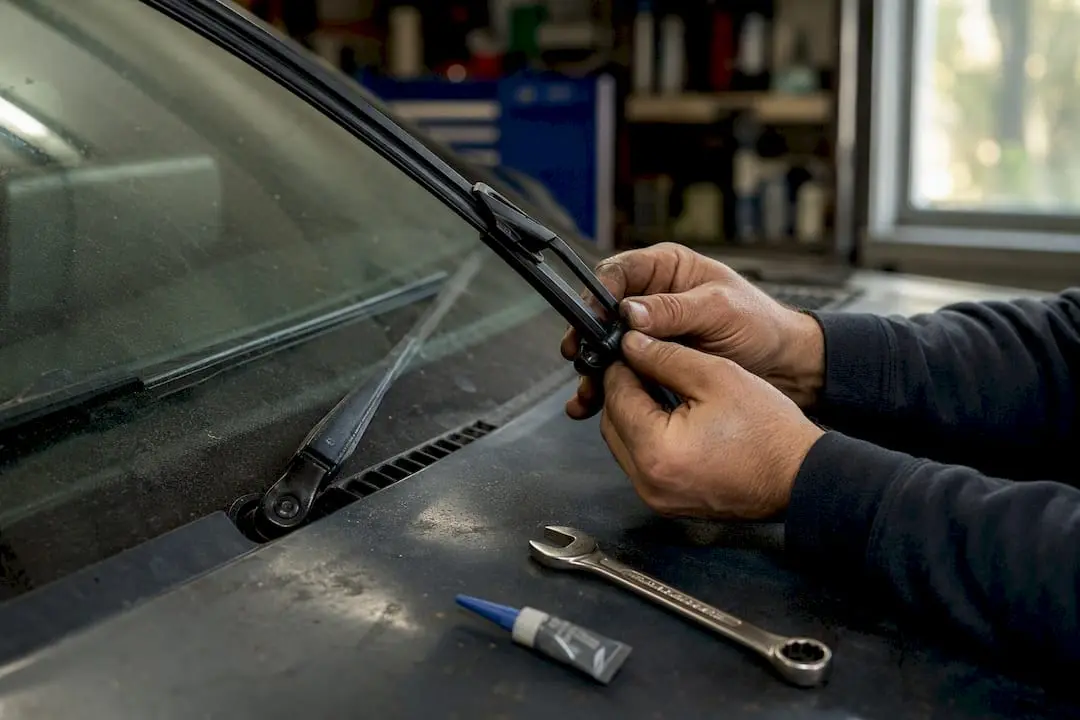
If your wipers stop halfway up the glass, sit crooked, or hover in front of your eye line instead of tucking below the bonnet, the fastest fix is usually simple: run a soft cycle reset before you touch a single bolt. Cycle the wipers on low speed, then high speed, then switch them off and watch exactly where they park.
If they land in the same wrong spot every time, you’re dealing with a mechanical wiper alignment issue. The arm or linkage has slipped out of sync with the motor, and a manual realignment will sort it.
If the behaviour is inconsistent (random stopping points, wipers that keep running after you’ve switched off, or park faults that appear only in the cold) the fault usually sits with the motor’s park switch. That’s a different repair path altogether.
- Consistent wrong position → mechanical realignment
- Random or intermittent behaviour → electrical fault, test the motor
- Wipers won’t stop at all → check the park switch and relevant fuse first
Key Takeaways
A correct wiper park position fix follows a fixed sequence: reset first, diagnose the fault type, reindex the linkage if it’s mechanical, then test thoroughly before final tightening.
| Point | Details |
|---|---|
| Try resets before disassembly | A soft cycle or power down reset often restores correct parking without any tools. |
| Match symptom to fault type | Consistent wrong park points suggest linkage issues; random or intermittent faults suggest the park switch. |
| Reindex against the motor, not the glass | Position the arm to the motor’s own internal park point, then confirm before final torque. |
| Snug before torque | Hand tighten and test several cycles first, since overtightening early can strip splines. |
| Replace when resets fail repeatedly | A motor or linkage that won’t hold its park point after correct reindexing usually needs replacing. |
Primary sources and further reading
Technical references on wiper motor mechanics, reset methods, and calibration are linked throughout the sections above.
Table of Contents
- Is it a mechanical fault or an electrical one?
- Three quick reset methods to try first
- How do you manually realign the wiper arms and linkage?
- How do you know the fix has actually worked?
- When should you replace the motor or linkage instead?
- Editorial take: what actually fixes wipers, and what doesn’t
- Sources
- FAQ
Is it a mechanical fault or an electrical one?
Working out which side of the system has failed saves you from pulling apart a perfectly good linkage or replacing a motor that just needed a reset. The two failure types look similar at a glance but behave very differently once you start testing.
Mechanical faults show up as a wrong park point that never changes. You’ll often see visible play when you wiggle the arm at the pivot, hear a clanking noise as the wipers start their cycle, and find worn ball joints or a loose arm nut if you look closely at the linkage. Samarins’ breakdown of wiper motor and linkage symptoms notes that a consistent wrong park spot usually points to a linkage or arm indexing problem rather than anything electrical.
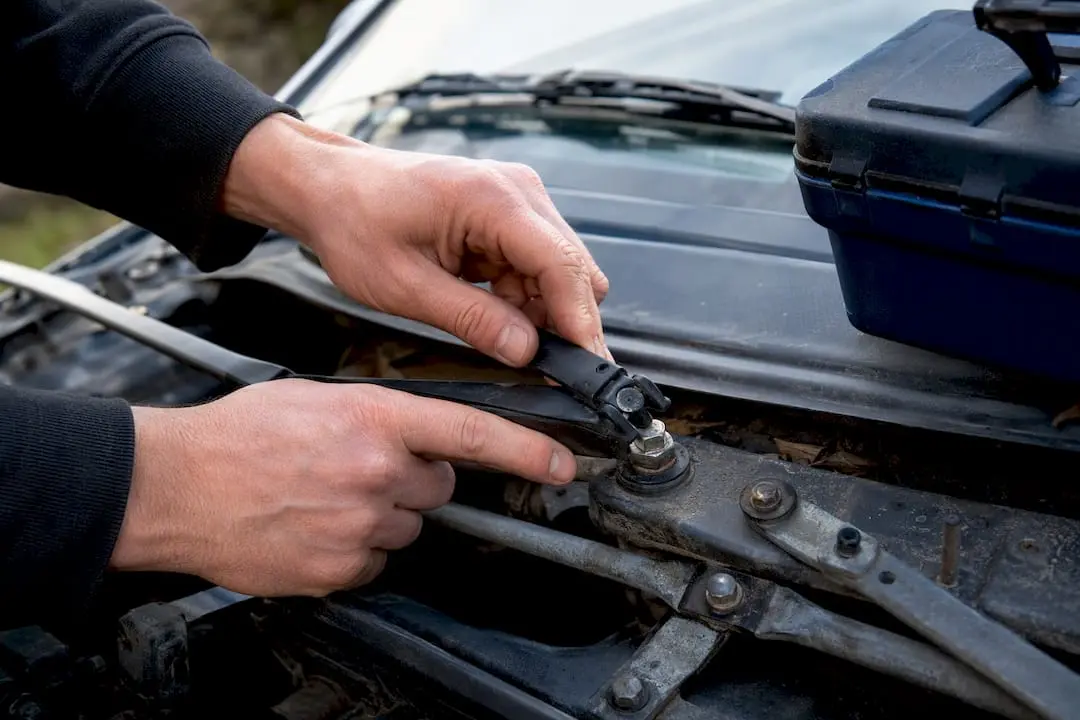
Electrical faults behave erratically. The park position drifts, the wipers park in a different spot each time, or they simply refuse to stop when you flick the switch off. Temperature can be a giveaway here too: a fault that appears on a cold morning and settles down once the motor warms up is a classic sign of worn park switch contacts rather than a mechanical misalignment.
Before assuming the worst, run through this quick sequence:
- Do a visual check of the arms and linkage for obvious looseness or corrosion
- Try the soft cycle reset described above and note where the wipers park
- Grip the splined pivot and feel for play or wobble
- Listen closely during the first few seconds of a cycle for clanking or grinding
- Check the wiper fuse and relay before assuming the motor itself has failed
A clanking noise on startup is one of the earliest warning signs of a failing linkage, and it’s worth acting on before the joint fails completely and leaves you without wipers in the rain.
Three quick reset methods to try first
Most wiper park position fix jobs never need a spanner. Try these three methods, in order, before you consider pulling the cowl off.
- Soft cycle reset. Turn the wipers on low speed for two or three full sweeps, switch to high speed for another two or three, then turn them off completely and watch where they settle. This clears minor timing glitches in the motor’s internal memory and restores correct parking in a surprising number of cases.
- Power down reset. Disconnect the negative battery terminal for five to ten minutes. This forces any onboard controller to forget its last known wiper position, so it re‑establishes park position fresh the next time you start the car. Reconnect, start the engine, and run several cycles to confirm.
- Motor re‑sync. If the first two methods don’t work, you may need to expose the motor (through the cowl or from under the dash, depending on the vehicle) and run one controlled cycle with the arms detached, letting the motor return to its own internal park position. Refit the arms to match that position rather than forcing them to match the glass.
Pro Tip: Always test through at least five full cycles before deciding a reset has worked. A motor can appear to park correctly once and then drift on the second or third sweep if there’s an underlying timing fault.
A methodical reset, diagnose, then reindex approach clears the majority of wiper park position faults without needing to replace a single part.
How do you manually realign the wiper arms and linkage?
When the reset methods don’t shift a consistently wrong park point, the arms or linkage have almost certainly slipped their index on the motor’s splined shaft. This is a straightforward job with basic tools, but it rewards patience over speed.
Before you start: park the vehicle on level ground, apply the handbrake, and turn the ignition off. If you’ll be working anywhere near the wiring or motor connector, disconnect the negative battery terminal. Wear eye protection, since you’ll be working close to the windscreen with tools that can slip.
- Mark the current position of each wiper arm on the glass with a strip of masking tape and a marker. This gives you a reference point if anything goes wrong during the job.
- Remove the plastic cowl or trim cover at the base of the windscreen to expose the motor shaft and linkage arms underneath.
- Loosen the nut holding the wiper arm onto its splined shaft. If it’s stuck fast, a squirt of penetrating oil and a few minutes’ wait will save you from bending the spline trying to force it.
- With the arm off, run the motor through a cycle (using the wiper switch, with the linkage disconnected if needed) so it settles into its own internal park position. This is the true reference point, not the mark you made on the glass.
- Refit the arm onto the shaft in the correct orientation for its park position, hand‑tighten the nut, and run several test cycles before doing anything further.
- Once you’re confident the park point is correct, tighten the nut to the torque figure in your vehicle’s service manual, or snug it firmly by hand if no spec is listed.
Being even one spline tooth out on this reindex can shift the entire park position and cause ongoing drift that accelerates wear on the motor’s internal gears, so it’s worth taking the extra few minutes to get the indexing right the first time rather than guessing and hoping.
Pro Tip: A small dab of Loctite 242 threadlocker on the arm nut helps stop it working loose under the heavy back‑and‑forth load wipers see every trip, but only use it if your vehicle manufacturer doesn’t specify otherwise.
Overtightening the arm nut before you’ve confirmed the park point is correct is the single most common mistake in this job. Service manual guidance on wiper arm fastening recommends a snug fit rather than maximum torque, because overtightening can strip the splines and leave you needing a full arm replacement instead of a simple reindex.
How do you know the fix has actually worked?
A wiper that parks correctly once isn’t proof the job is done. Run the wipers through five to ten full cycles at both low and high speed, and switch the washer function on partway through to simulate real driving conditions. Watch the park point every single time, not just the first two or three.
- Listen for any clanking or grinding that wasn’t there before your repair
- Check that the nut covers sit flush and haven’t been cracked during refitting
- Feel for free play at the arm pivot once everything has cooled down
If the park point holds steady across every cycle, you’re done. If it starts drifting again after a handful of cycles, that’s usually a sign of worn internal motor gears or a failing park switch rather than an indexing problem, and no amount of re‑adjustment will hold it long term.
When should you replace the motor or linkage instead?
Not every park position fault ends with a spanner and a reset. Replace the wiper motor when the park switch or internal brushes have failed. You’ll see this as intermittent running, wipers that won’t park at all despite correct reindexing, or faults that worsen in cold weather. Common wiper motor failure modes almost always point back to worn park switch contacts once resets and reindexing have been ruled out.
Replace the linkage or bushings if you find excessive play at multiple pivot points, a cracked or bent arm, or ball joints that keep popping out after you’ve refitted them correctly.
- A replacement wiper motor typically costs somewhere in the range of a mid‑tier consumable part, with workshop labour adding a further cost on top depending on how accessible it is behind the cowl
- Linkage assemblies and bushings tend to sit at the lower end of the parts‑cost scale, but labour varies a lot between vehicles
- Regional labour rates and vehicle‑specific access difficulty can swing the total cost significantly, so get a quote before committing
Tools, consumables and safety precautions for the repair
You don’t need a full workshop kit for this job, but a few specific items make the difference between a clean fix and a frustrating one.
- A socket set matched to your vehicle’s arm nut size (this varies between makes)
- A torque wrench, if your service manual lists a spec
- Trim removal tools to lift the cowl without cracking clips
- Penetrating oil for stuck arm nuts
- Pliers, masking tape, a marker, and Loctite 242 threadlocker
Always isolate the battery before working near the motor wiring, wear eye protection, and use plastic trim tools rather than metal screwdrivers near the glass and paintwork to avoid scratches. When removing a stuck arm, work it gently side to side rather than levering hard in one direction, which is the fastest way to bend a spline beyond saving.
A technician’s practical notes on getting this right
Mark your reference points on the glass before you loosen anything, and always confirm the motor’s own internal park position before you refit the arm, not just where it looks right against the cowl line. That one habit prevents most of the repeat jobs I’ve seen.
If you’re already into the cowl and linkage for a realignment, it’s worth checking the condition of your wiper blades at the same time. A vehicle-specific fitment tool that matches blades to your exact make and model saves a second trip under the bonnet later, and a proper fitment guarantee backed by a 12 month warranty means you’re not guessing on size or connector type.
Editorial take: what actually fixes wipers, and what doesn’t
Most advice on this topic jumps straight to disassembly, which is the wrong order of operations. The research is clear that a soft cycle reset or power down reset resolves a large share of park position faults on its own, and skipping that step in favour of pulling arms off wastes time and risks stripping splines for no reason.
Where the conventional advice really falls down is in treating every wrong park position as a mechanical problem. Temperature sensitive faults and intermittent running are electrical tells, and no amount of reindexing fixes a worn park switch. I’d also push back on the instinct to torque the arm nut down hard the moment it’s back on. Snug it, test it through several cycles, then torque it. Testing before final tightening is the step DIYers skip most often, and it’s the one that causes callbacks.
Prioritise in this order: reset, diagnose, reindex, test, then replace only if nothing else holds. That sequence, not the tool kit, is what separates a lasting fix from a repeat job.
— Faisal
Sources
- Wiper motor, linkage: how it works, symptoms, problems, testing — Samarins
- Get Your Wipers Back in Sync: The Wiper Motor Reset Method — FridayParts (AU)
- How do you calibrate a wiper motor for park position? — Junt Motor
- Service manual guidance on wiper arm fastening and torque — Tesla Service Manual
- Carparts
FAQ
How Do You Reset the Wiper Park Position?
Run the wipers through a low speed cycle, then a high speed cycle, then switch off and check where they park. If that doesn’t work, disconnect the battery’s negative terminal for five to ten minutes to clear the controller’s memory.
Why Won’t My Wipers Return to the Rest Position?
Usually a mechanical linkage or arm has slipped out of index with the motor, or the motor’s internal park switch has failed. Consistent wrong parking points to the linkage; random or intermittent stopping points to the switch.
How Much Does It Cost to Fix a Wiper Linkage?
Costs vary a lot by vehicle and region, with linkage and bushing parts generally cheaper than a full motor, and labour making up a large share of the total depending on how accessible the cowl and linkage are.
How Do You Reset the Wiper Motor Position?
Expose the motor, run a cycle with the arm detached so the motor settles into its own internal park, then refit the arm to match that position rather than to a mark on the glass.