
Replacing wiper blade inserts: the Aussie driver’s guide

TL;DR:
- Worn wiper blade inserts can cause streaks and reduce visibility during rain, but they are inexpensive and easy to replace yourself. Knowing your connector type, measuring insert length accurately, and using proper tools are essential steps for a successful DIY replacement. Regular maintenance, especially in harsh Australian conditions, ensures clear visibility and safe driving year-round.
Worn wiper blade inserts are one of those maintenance items that sneak up on you. One rainy morning on the M1 or the Hume Highway, you flick on the wipers and get streaks, smears, or that fingernails-on-a-chalkboard squeak instead of a clean sweep. Replacing wiper blade inserts yourself takes less time than a petrol stop, costs a fraction of a full blade change, and gives you back the clear visibility you need in Australian conditions ranging from summer downpours to winter fog. This guide walks you through the entire process.
Table of Contents
- Key takeaways
- What you need before replacing wiper blade inserts
- Step-by-step guide to installing wiper blade inserts
- Fixing problems after the install
- Buying quality wiper blade inserts in Australia
- My take on making insert replacement a regular habit
- Get the right inserts for your vehicle at GWC Wipers
- FAQ
Key takeaways
| Point | Details |
|---|---|
| Inserts save you money | Refills cost a fraction of full blade assemblies, making DIY replacement a smart choice for most Australian drivers. |
| Connector type matters | Knowing your wiper arm connector style (J-hook, pin, or bayonet) determines how you remove and reinstall inserts correctly. |
| Preparation prevents damage | Using a folded cloth on the windscreen and activating service position protects your glass and wiper arms during the job. |
| Streaking usually has a fix | Most post-install streaking comes from a dirty windscreen, backwards insert fitting, or a missing tension strip. |
| Beam blades change the equation | Modern aerodynamic beam blades often don’t accept refill inserts, meaning a full blade swap may be your only option. |
What you need before replacing wiper blade inserts
Getting organised before you start means the job takes 5 to 15 minutes rather than a drawn-out fumble in the driveway. Having the right tools and measurements on hand is the difference between a smooth swap and a broken clip.
Measuring your insert length
Driver and passenger wiper blades are almost always different lengths on Australian vehicles. Check your owner’s manual or use an online vehicle selector tool before you buy. Measure the rubber insert from tip to tip if you’re unsure, and note whether you have a conventional framed blade or a frameless beam blade. Only conventional and some hybrid blades accept replacement inserts. Beam-style blades have longer lifespans but often do not accept refills at all, which means a full blade replacement is your only path forward on many modern cars.
Tools and materials checklist
| Item | Purpose | Notes |
|---|---|---|
| Replacement wiper inserts | The rubber refill that does the wiping | Match to blade length and attachment style |
| Flat-head screwdriver | Release connector clips | Wrap tip in tape to avoid scratching |
| Folded microfibre cloth | Protect windscreen if arm springs back | Place over glass before lifting arm |
| Ruler or tape measure | Confirm insert length | Measure old insert before discarding |
| Glass cleaner and cloth | Clean windscreen before fitting | Removes grit that causes noise and streaking |
Pro Tip: Activate your wiper service position if your car supports it. This parks the arms vertically for easy access and prevents them from snapping back onto the glass. Check your owner’s manual or a quick search for your make and model.
Before lifting any wiper arm, place a folded cloth on the windscreen glass directly beneath it. J-hook connectors account for over 90% of conventional blade attachments in Australia, but pin and bayonet styles are common on European vehicles including BMW, Mercedes-Benz, and some Volkswagen models. Knowing your connector type before you start prevents forcing the wrong release mechanism and snapping a clip.
Step-by-step guide to installing wiper blade inserts
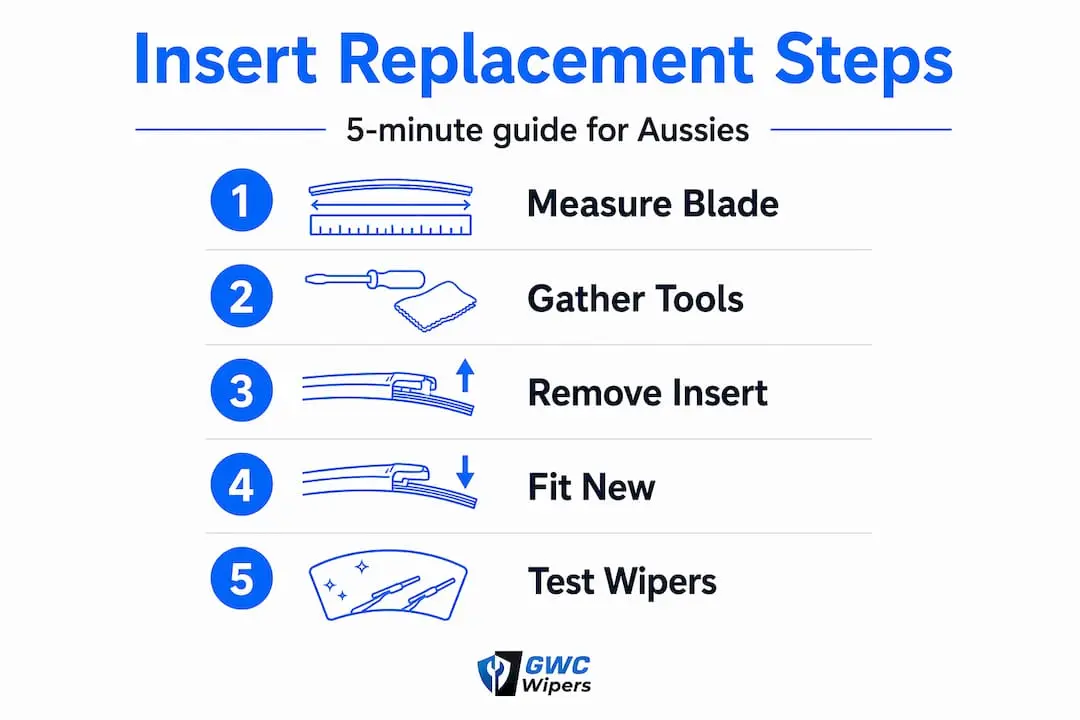
With your tools ready and your inserts measured, the actual replacement is straightforward. Work on one blade at a time so you always have the other as a reference if you lose track of how the insert was seated.
-
Lift the wiper arm away from the windscreen to a locked upright position. Support it gently. Let it rest against your folded cloth if it doesn’t lock in place.
-
Identify your connector type. For a J-hook, look for a small plastic tab where the blade meets the arm. For bayonet and pin mounts, you’ll see a side-pin or a sliding sleeve instead. Refer to the installation step-by-step guide at GWC Wipers if your connector looks unfamiliar.
-
Release the old blade assembly. Press the tab or slide the sleeve to disengage the blade from the arm. Set the assembly on your cloth or a clean surface.
-
Remove the old insert from the blade frame. On most framed blades, the rubber insert slides out from one end of the frame. Look for a small stopper clip at one end. Slide the clip off, then pull the insert straight out along the frame channel.
-
Check the metal tension strips. Some inserts contain one or two thin metal strips running the length of the rubber. These strips maintain pressure and blade rigidity across the curved windscreen. If your new insert doesn’t include them, carefully pull the strips from the old insert and transfer them to the new one before fitting.
-
Slide the new insert in. Feed it into the frame channel from the end you removed the stopper. Align the notches or tabs along the insert with the claws in the frame as it slides through.
-
Reattach the stopper clip at the end to lock the insert in place. Give the insert a firm tug to confirm it’s seated and won’t slide out.
-
Reattach the blade to the wiper arm. Click it back onto the connector until you hear or feel a firm snap.
-
Lower the arm gently back onto the windscreen. Never let it spring back uncontrolled.
-
Repeat on the other side, then test both wipers with your washer fluid before driving.
| Connector type | Release method | Common vehicles |
|---|---|---|
| J-hook | Press plastic tab, rotate and pull | Most Japanese and Korean vehicles |
| Bayonet (pin) | Press side pin, slide blade sideways | Many European vehicles |
| Pinch tab | Squeeze both sides of connector | Some Ford and GM models |
| Top lock | Press top clip down and pull away | Select Hyundai and Kia models |
Pro Tip: If your new insert feels loose in the frame channels after fitting, double-check that the metal tension strips are correctly seated. A slack insert will skip across the glass instead of wiping cleanly.
Incorrect blade sizing or backwards fitting causes poor wiping performance and is a genuine safety risk. Before lowering the arm, hold the fitted blade up to the light and confirm the wiping edge faces the glass, not the sky.
Fixing problems after the install
Even a careful installation can produce a few teething issues. Most are quick to resolve once you know what to look for.
-
Streaking or smearing. The most common cause is a dirty windscreen. Cleaning the windscreen before and after fitting the new insert removes grit and old wiper fluid residue that degrades wiping quality straight away. Wipe down the rubber insert itself with a damp cloth before first use.
-
Squeaking or chattering. This usually means the insert is dragging rather than gliding. Check that the rubber isn’t twisted in the frame and that the blade angle is sitting flush against the glass. A light wipe of the rubber edge with a clean cloth soaked in glass cleaner often solves it.
-
Skipping or lifting at speed. If the blade lifts off the glass at highway speed, the tension strips may be missing or incorrectly transferred. Metal tension strips must be reused from the old insert when fitting a universal refill. Without them, the blade loses the rigidity needed to maintain contact across a curved windscreen.
-
Insert sliding out of the frame. The stopper clip at the end of the frame has not been fully engaged. Remove the insert, refit the clip, and slide the insert back in until it locks.
-
Wiping only part of the windscreen. The insert may be the wrong length or the blade frame itself is bent. Measure your insert against the original and inspect the frame for damage. If the frame is warped, replacing the complete blade assembly is the better option.
When should you skip the insert and replace the whole blade? If the frame is corroded, the blade arm spring feels weak, or the connector is cracked, a full replacement is the more reliable choice. The cost difference is smaller than you might expect, and it removes every variable at once.
Buying quality wiper blade inserts in Australia
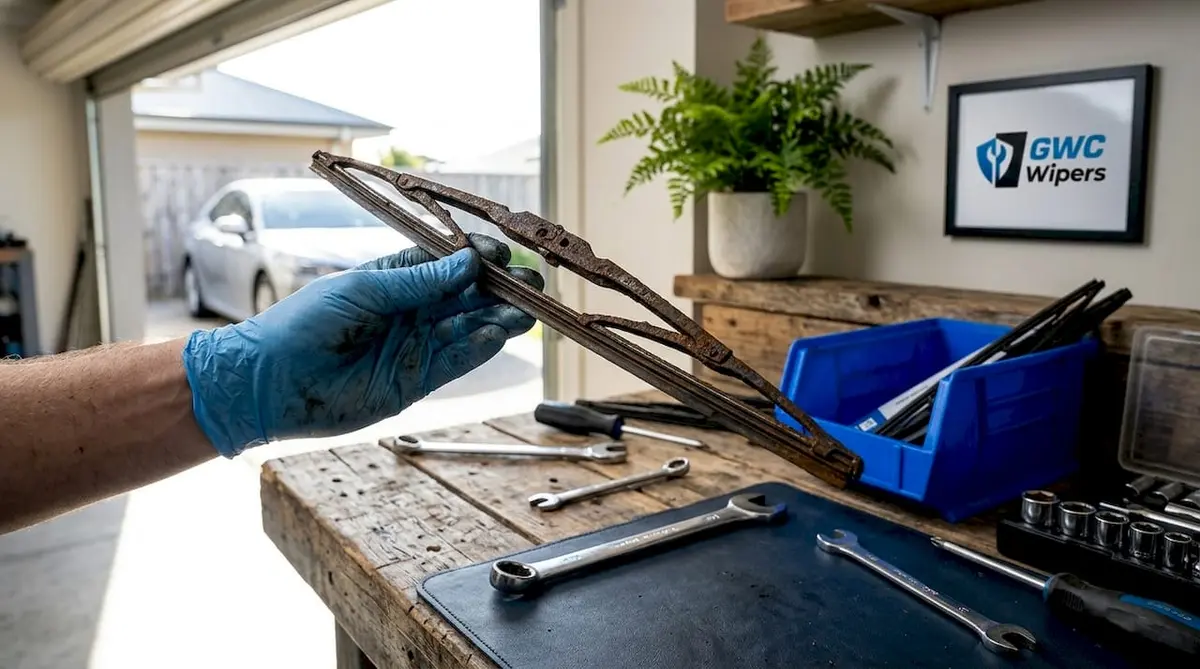
The price difference between a full blade and a refill insert is significant. Full wiper blade sets range from under $20 to over $50 each, while quality refill inserts cost considerably less. For drivers doing regular maintenance across two or three vehicles, that saving compounds quickly.
What to look for when buying inserts:
- Rubber compound quality. Natural rubber cracks faster under Australian UV exposure. Synthetic and blended rubber compounds handle the heat of a Queensland summer and the cold of a Canberra winter far better. Some manufacturers use advanced rubber compounds specifically designed to reduce noise and extend service life beyond standard replacements.
- Universal vs. vehicle-specific inserts. Universal inserts require you to transfer tension strips and trim the insert to length in some cases. Vehicle-specific refills are cut to size and profiled to match your windscreen curve, which is a faster and more reliable fit.
- Beam blade compatibility. The shift toward beam blades on modern vehicles means inserts are becoming less common across the full fleet. Check your blade type before buying a refill. If your car came from the factory with beam blades, a full blade swap is the right call.
- Noise reduction technology. Premium blades can reduce operating noise by up to 70% compared with standard replacements, which matters on long drives or in stop-start city traffic. If noise bothers you, look at the rubber formulation and blade design rather than just the price.
For a deeper look at how refills compare with full blade replacements, the wiper refills guide at GWC Wipers covers the cost breakdown in detail. If you want to understand how blade coatings affect long-term performance, the wiper coating guide is worth reading before you buy.
Pro Tip: When buying Bosch wiper blade inserts or other branded refills for European vehicles, confirm the connector style matches your wiper arm before purchasing. Bosch produces inserts for both J-hook and bayonet systems, and they are not interchangeable.
My take on making insert replacement a regular habit
I’ve spoken with a lot of Australian drivers who wait until they literally cannot see through the rain before they deal with their wipers. That’s understandable. Wipers are one of those components that only make themselves noticed when they fail. But the cost of delaying is real.
In my experience, the detail most people miss during a DIY insert replacement is the tension strip transfer. It’s not obvious, and most installation guides skip over it. But fitting a new universal insert without those strips produces a blade that skips and lifts within weeks, leaving you thinking the insert was poor quality when the problem was the installation. Always check for those strips before you discard the old insert.
I also think drivers underestimate how much Australian conditions accelerate rubber degradation. The UV index in most parts of Australia is brutal, and even a blade parked in direct sunlight will crack and harden faster than the same blade in Europe or the UK. Replacing inserts every 6 to 12 months rather than waiting for visible failure keeps your visibility where it needs to be year-round.
The shift toward beam blades does complicate the picture slightly. If your car has beam-style wipers, buying inserts isn’t an option. But for the large share of Australian vehicles still running conventional framed blades, insert replacement remains one of the best value maintenance tasks you can do yourself.
— Faisal
Get the right inserts for your vehicle at GWC Wipers
Whether you’re maintaining a family SUV, a work ute, or a European vehicle with specific wiper fitments, GWC Wipers has a range of premium wiper blades and inserts built to handle Australian conditions.
GWC Wipers offers model-specific fitments for popular makes including Mercedes-Benz B Class and Mercedes-Benz M Class vehicles, with a perfect fit guarantee backed by a 12-month warranty and free shipping across Australia. Use the vehicle selector tool to find the correct blade for your make, model, and year in seconds. If you need guidance, the GWC Wipers team is ready to help you find the right match and get your visibility back where it belongs.
FAQ
How often should I replace wiper blade inserts?
Replace wiper blade inserts every 6 to 12 months in Australian conditions. UV exposure and heat degrade rubber compounds faster here than in cooler climates, so inspect your blades after each wet season.
Can I use universal inserts on any car?
Most cars with conventional framed wiper blades accept universal inserts, but beam-style blades do not accept refills. Check your blade type before buying, and confirm the insert length matches both the driver and passenger sides.
What tools do I need for wiper replacement?
The basic tools for wiper replacement are a flat-head screwdriver, a tape measure, a microfibre cloth, and glass cleaner. Most insert replacements require no specialist tools beyond these.
Why are my new inserts still streaking after installation?
Streaking after installing wiper blade inserts is usually caused by a dirty windscreen, a missing metal tension strip, or an insert fitted back-to-front. Clean the glass thoroughly, confirm the wiping edge faces the correct direction, and check that tension strips are in place.
Are Bosch wiper blade inserts worth the extra cost?
Bosch wiper blade inserts use quality rubber compounds and are available for a wide range of Australian vehicles. They are a reliable choice, particularly for European vehicles, though always confirm the connector type matches your wiper arm before purchasing.
Recommended
- Best windshield wiper blade types for Australian drivers | GWC Wipers
- Quick install wiper blades: Fast, DIY upgrades for Aussie drivers | GWC Wipers
- Upgrade your windshield visibility: expert guide for Australian drivers | GWC Wipers
- DIY wiper install guide: high-performance wipers in 2026 | GWC Wipers