
Australian DIY: Free seized wiper arms, oil then puller then heat
If the blade doesn’t budge, release its clip or hook and slide it off the hook arm. If the whole arm is seized on its splined post, prop it up in the service position, back the retaining nut off until it’s flush (don’t remove it yet), then rock and pull straight up. Corrosion that won’t shift by hand calls for penetrating oil and a proper wiper arm puller, never a screwdriver jammed against the glass or cowl. If it still won’t move, stop and see a workshop before you crack a windscreen or strip the motor spindle.
TL;DR:
- Seized wiper arms often require penetrative oil and a proper puller to avoid damaging the glass or cowl panel, especially when corrosion bonds the parts together.
- Using a dedicated wiper arm puller and allowing oil to soak overnight significantly increases the chances of freeing a stubborn, corroded arm without breaking components.
- Applying controlled heat can help break corrosion bonds, but cutting the arm should only be a last resort if the spindle and motor are not salvageable.
- Properly cleaning and lubricating the splines before reinstallation prevents the arm from seizing again and extends the lifespan of the wiper assembly.
- Avoid common mistakes such as prying against the glass, removing the nut prematurely, or forcing parts without tools, as these actions lead to costly damage.
Table of Contents
- Tools and safety prep for stuck wiper blade removal
- How do you remove a stuck wiper arm step by step?
- What if the wiper arm is seized and won’t move?
- What mistakes make wiper blade removal worse?
- How do you reinstall and prevent the arm seizing again?
- A short, practical note from Faisal
- Quick help: replacement blades and fitment from GWC Wipers
- Sources
- FAQ
Tools and safety prep for stuck wiper blade removal
Half the battle with a seized wiper arm is having the right kit on hand before you touch a socket. Rushing this step is exactly how DIYers strip a nut or scratch the bonnet, so lay everything out first.
- Socket set (check your owner’s manual, but 10mm, 13mm and 15mm cover most retaining nuts)
- Small flathead screwdriver or a plastic trim pry tool for popping the cap
- Penetrating oil (spray straight onto the base of the arm)
- Clean rag to protect the glass and soak up excess oil
- Rubber mallet for gentle persuasion, not brute force
- Wire brush to clean corrosion once the arm is off
- Wiper arm puller for anything that won’t shift by hand
- Gloves and eye protection, because springs and rust don’t play nice
Park on level ground, kill the ignition, and set the parking brake so the wipers stay in a fixed park position while you work. A strip of painter’s tape marking exactly where the arm sits on the glass saves you a guessing game on reinstall. Tuck a rag under the blade tip before you start levering anything, since a slipped pry tool against bare glass is the single most common way this job ends badly.
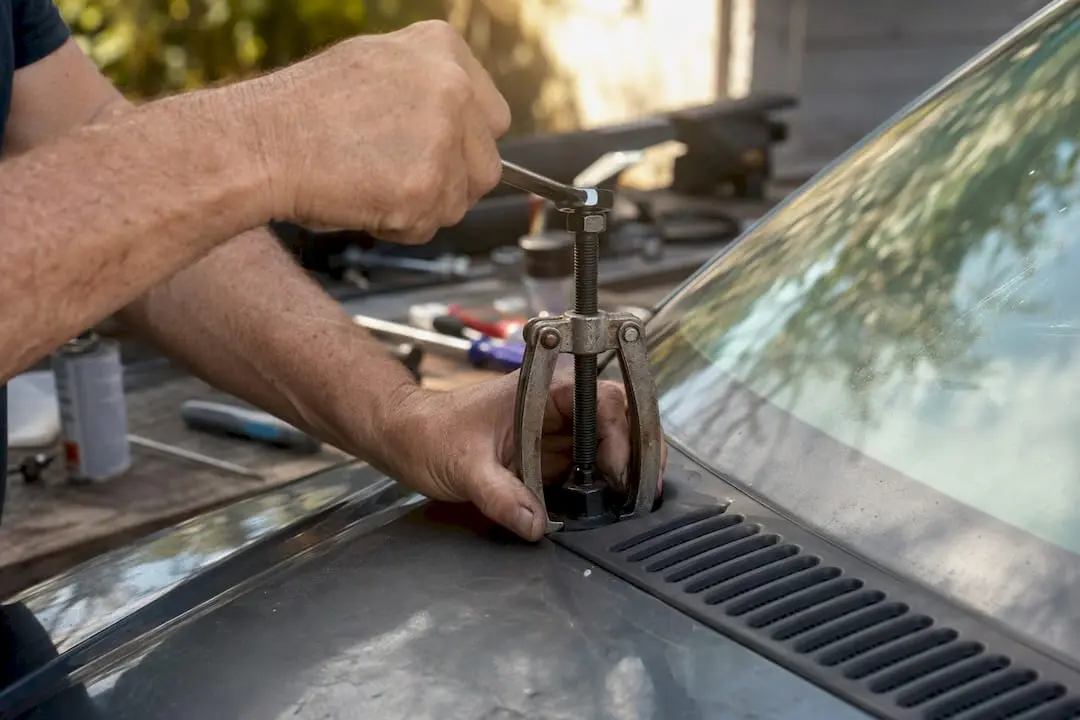
A dedicated puller earns its keep here because it pulls straight up in a controlled, even motion. A pry bar or big screwdriver, by contrast, tends to push sideways against the cowl panel or windscreen edge, and that’s where cracks start.
How do you remove a stuck wiper arm step by step?
Most stuck wiper blades and arms come off with a methodical sequence, not force. Work through it in order and don’t skip the service position step, even if the arm feels loose.
- Pop the plastic cap. Use a flathead or trim tool to lever off the small cap hiding the retaining nut. It usually clips or peels away without much resistance.
- Loosen the nut, but leave it threaded. Back the nut off until it sits flush with the top of the spindle rather than pulling it off completely. This detail matters more than it sounds: the nut acts as a physical stop so the arm can’t suddenly spring up and crack the windscreen if it releases without warning.
- Lift the arm to service position. Most vehicles let you raise the arm to a near-vertical position, which takes the spring tension off the linkage and makes the whole job far less of a fight.
- Protect the glass. Slide a rag under the blade tip before applying any pressure, so a slipped tool or a sudden release doesn’t land straight on bare glass.
- Rock, don’t twist. Grip the arm near the base and rock it gently towards the windscreen, then away, while pulling straight up. Twisting sideways or levering against the cowl is what bends brackets and cracks plastic trim.
- Handle blade-only sticking separately. If the arm moves fine but the blade itself won’t release, look for a small tab or hook release, since most mounting types use a clip, hook, or pin adaptor rather than a permanent fitting. Squeeze or lift the release tab while sliding the blade down the arm hook, and it should come free without cutting anything.
This sequence handles the vast majority of jobs. Where it doesn’t work is where corrosion has bonded the arm to the spindle, and that calls for a different approach entirely.
What if the wiper arm is seized and won’t move?
Corrosion between the arm and the splined spindle creates a bond that no amount of rocking will break. This is where you escalate methodically instead of forcing it, because each step below buys you leverage without risking the glass or the wiper motor.
- Penetrating oil first. Spray it liberally around the base of the arm and let it work its way into the spline. A quick 15 to 30 minute soak handles light corrosion; for anything worse, leave it overnight and reapply in the morning before trying again.
- Move to a wiper arm puller. Position the jaws under the base of the arm, centre the puller’s screw against the spindle, and tighten it slowly and evenly. A puller applies vertical force exactly where you need it, which matters because penetrating oil alone often isn’t enough once corrosion has properly bonded the metal.
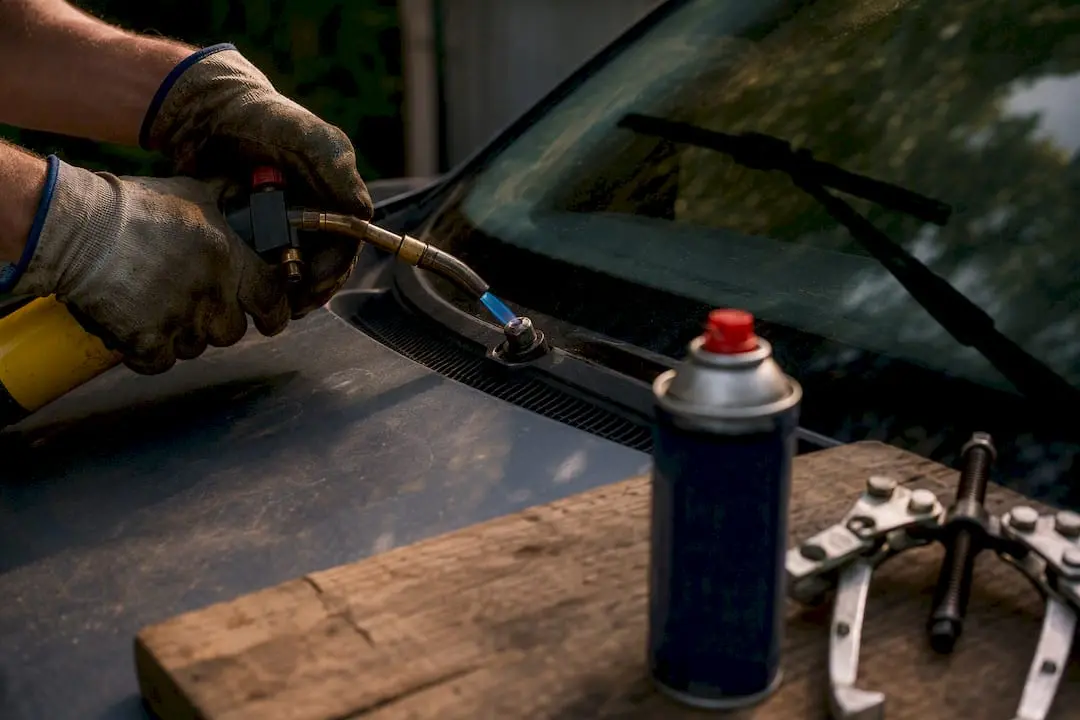
- Controlled heat, if the arm still won’t budge. A heat gun on a low setting, held near the base for short bursts, encourages the metal to expand slightly and can break the bond. Keep it well clear of wiring, rubber trim, and the plastic cowl.
- Cutting as an absolute last resort. If the arm is scrap anyway and your priority is saving the spindle and motor, cutting the arm off close to the base is sometimes the only practical option. Only go this route once you’ve accepted the arm itself is a write off.
Pro Tip: Reapplying penetrating oil twice, twelve hours apart, frees far more seized arms than one heavy dose does. Corrosion needs time to wick the oil in, not volume.
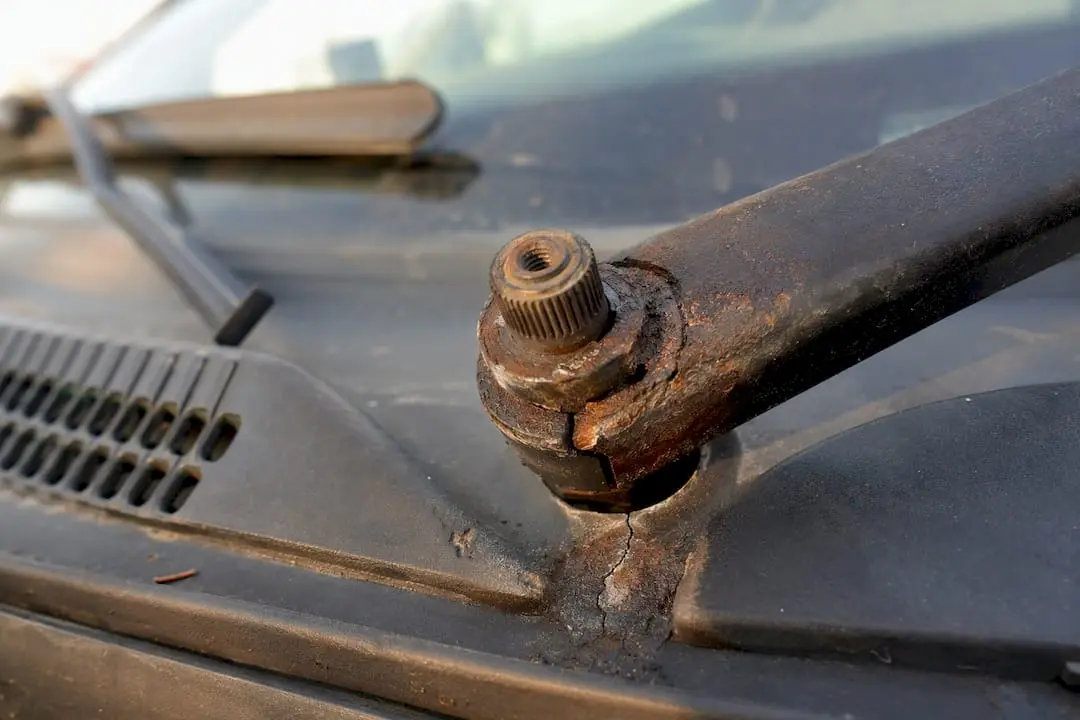
If you’ve worked through oil, a puller, and careful heat and the arm still hasn’t moved, or you notice the wiper motor grinding, splines visibly stripped, or a hairline crack starting near the base, stop. That’s a workshop job, not a driveway one.
What mistakes make wiper blade removal worse?
A handful of shortcuts cause almost every DIY wiper disaster, and every one of them is avoidable if you slow down for thirty seconds.
- Prying against the glass or cowl. A screwdriver that slips off a stubborn arm and lands on the windscreen edge is how a five-minute job turns into a $600 glass replacement.
- Removing the nut too early. Taking the retaining nut off completely before the arm is under control means it can spring loose without warning; leaving it flush gives you a safety stop.
- Open flame near plastic or wiring. A heat gun is fine in short, controlled bursts; a lighter or torch anywhere near the wiper motor loom is not.
- Hammering without protection. A rubber mallet on an unprotected arm base can bend the bracket or crack surrounding trim.
- Repeated yanking. Forcing a seized arm by hand, over and over, strips the splines faster than any other single mistake. If the puller hasn’t worked after a fair go, that’s your cue to call a workshop rather than keep pulling.
How do you reinstall and prevent the arm seizing again?
Getting the arm off is only half the job. What you do before it goes back on determines whether you’re doing this again in twelve months or in five years.
Clean the splines with a wire brush or fine 400-grit sandpaper to strip back any residual corrosion, then apply a thin layer of anti-seize compound or water-resistant lithium grease. This single step is what actually stops the galvanic bonding that seized the arm in the first place.
- Align the arm using the painter’s tape mark from earlier, then press it down firmly onto the splines.
- Hand-thread the retaining nut and snug it up; don’t over-torque it, since that can crack the plastic base or distort the spline fit.
- Snap the cap back into place and lower the arm down onto the glass.
- Run a full wipe cycle and check for even clearance and no streaking across the full sweep.
- If one arm shows heavier wear or corrosion than the other, replace both blades together rather than mismatching old and new.
If you’re near the coast or drive on salted winter roads, a yearly inspection with a light grease reapplication is worth the ten minutes. Older arms showing surface rust are cheaper to replace now than to fight with a puller in two years.
A short, practical note from Faisal
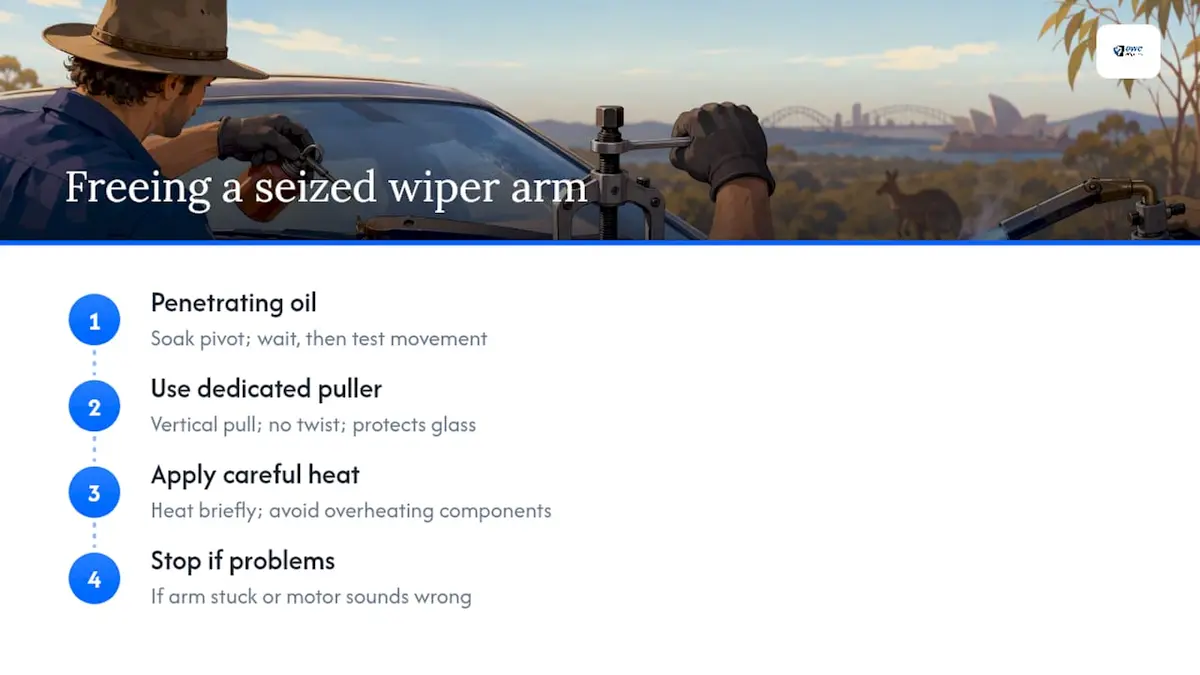
I’ve watched a straightforward blade swap turn into an hour-long standoff more than once, all because a corroded arm wouldn’t let go of its spindle without a proper puller. Oil alone rarely finished the job on anything with real coastal rust; the puller did, every time, without a single mark on the glass.
If you’ve worked through the escalation ladder and the arm still hasn’t moved, or the motor sounds wrong when you test the wipers, stop there. A stripped spindle or a cracked cowl costs far more to fix than a workshop visit ever will. Once you’ve got the old arm or blade off cleanly, GWC’s vehicle selector and fitment guides make finding the right replacement straightforward.
— Faisal
Quick help: replacement blades and fitment from GWC Wipers
Once the stuck arm or blade is off, most drivers find the old one was overdue for replacement anyway, corrosion and cracked rubber tend to go hand in hand. Com designs and fits blades for over 2,500 vehicle models, so instead of guessing at a generic size off the shelf, you plug in your make, model and year and get the exact fit for your car.

Every order ships free across the country, backed by a 30-day money-back guarantee and a 12-month warranty, so there’s no risk in getting it wrong. If you’re sorting a Toyota or a Mercedes-Benz, the category pages show every compatible option at a glance, and the alfa-romeo giulietta page is a good example of how specific the fitment guides get. Head to the vehicle selector, pick your car, and order the replacement while the old arm’s still in your hand.
Sources
FAQ
How do I get windscreen wipers off that are stuck?
Prop the arm into the service position, back the retaining nut off until flush, then rock the arm gently towards and away from the glass while pulling straight up. If corrosion is holding it in place, spray penetrating oil around the base and let it soak before trying again.
How do you remove stubborn wiper blades specifically, not the whole arm?
Look for the small release tab, clip, or hook on the blade adaptor and press it while sliding the blade down the arm hook. Most stubborn blades free up once you find the correct release point rather than pulling straight off.
How do you get a seized wiper arm off without breaking anything?
Soak the base in penetrating oil, ideally overnight for heavy corrosion, then use a dedicated wiper arm puller positioned under the arm with its screw centred on the spindle. Tighten it slowly and evenly rather than forcing it with a pry bar.
Why won’t my windshield wiper arm come off the spindle?
Galvanic corrosion between the arm and the splined post is the usual culprit, especially in coastal areas or after road salt exposure. It bonds the metal surfaces together, which is why hand force rarely works and a puller or controlled heat is often needed.
When should I stop trying and see a workshop?
Stop if the wiper motor grinds or resists during a test cycle, if the splines look visibly stripped, or if you notice cracking near the cowl or glass. Continuing to force a seized arm at that point risks a repair bill far larger than a workshop visit.