
Check the Fingernail Test First: Fix Wiper Scratches Safely
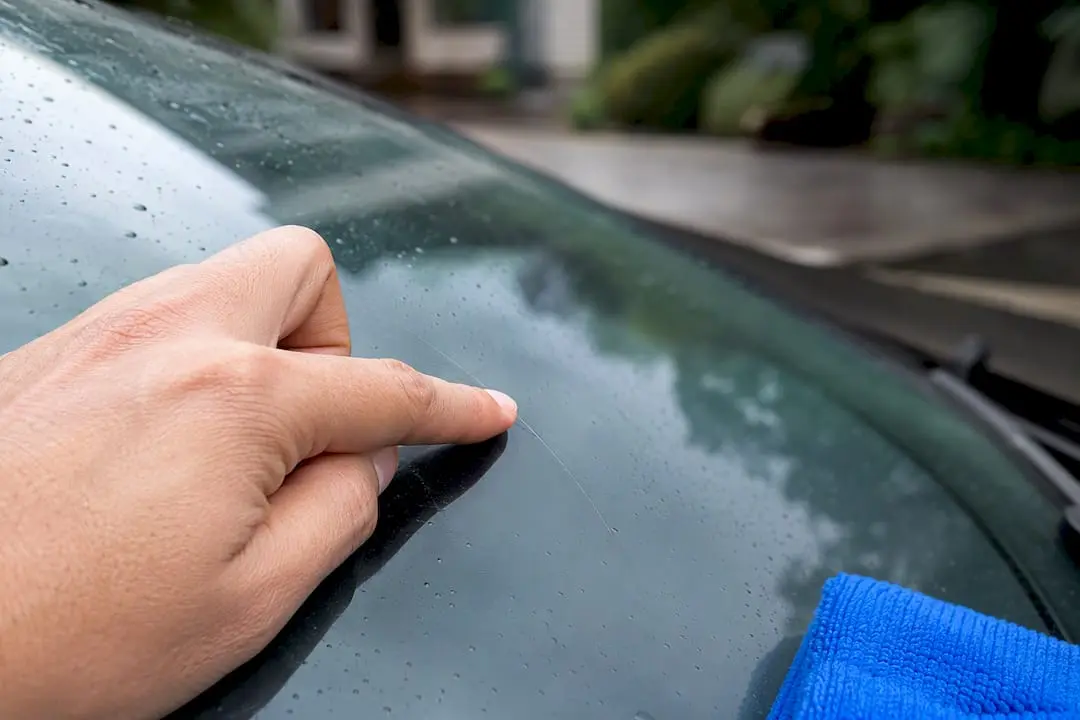
Most wiper-caused scratches are fine surface scuffs that respond well to careful polishing. Deep grooves that catch a fingernail usually need professional attention or full windscreen replacement, because they’ve cut past the surface. Your first move is simple: clean the glass properly, then run the fingernail test before you touch any polish.
TL;DR:
- Deep scratches catching a fingernail usually require professional repair or replacement, as DIY polish only works on surface-level marks.
- Wiper damage creates characteristic parallel arc-shaped scratches that follow the wiper’s sweep, unlike random chips from road debris.
- Proper cleaning, avoiding abrasive products like toothpaste or WD-40, and using cerium oxide polishing are crucial before attempting DIY repairs.
- Worn wiper blades with torn inserts or hardened rubber cause most scratches and should be replaced every several months for optimal protection.
- For significant or in-line-of-sight scratches, professional assessment is recommended to prevent further damage or optical distortion.
Table of Contents
- How to check scratch severity with the fingernail test
- Quick home fixes to try first (and what to skip)
- Cerium oxide polishing: step-by-step and safety guidance
- When to stop and call in a professional
- Preventing wiper scratches: blade care that actually works
- A technician’s perspective on realistic outcomes
- Stop the scratches coming back: check your blade fit
- Sources
- FAQ
How to check scratch severity with the fingernail test
Run a clean fingertip and then a fingernail lightly across the mark. If your nail catches, snags, or drags in a groove, the scratch is too deep for safe polishing and likely needs a professional repair or replacement instead. If your nail glides over smoothly with no resistance, you’re probably looking at a shallow scuff that DIY polishing can improve.
Do this test in good daylight, ideally with the glass wet and then dry, since some marks only show up under certain light angles. Wiper damage has a distinctive signature that helps you tell it apart from stone chips or road debris. It tends to appear as parallel, arc-shaped lines that repeat across the sweep path of the blade, following the exact curve your wipers travel every time they run.
Random chips and pits from road grit look different. They’re usually isolated, irregular, and scattered rather than following a consistent arc.
Pay close attention to scratches sitting directly in the driver’s primary sightline or over any camera or sensor housing near the top of the glass. These areas call for a conservative approach no matter how minor the mark looks.
- Wet test: mist the glass and check if the scratch is more or less visible
- Nail test: catches means deep, glides means shallow
- Arc pattern: scratches following the wiper’s sweep path point to blade damage, not road debris
- Location check: marks in the driver’s line of sight need extra caution before any DIY attempt
Pro Tip: A tiny grain of sand trapped in a torn wiper insert can carve a continuous arc across the entire sweep area in just a handful of trips, so a scratch that seems to have appeared overnight often has a much longer story behind it.
Quick home fixes to try first (and what to skip)
Before any polish touches the glass, clean it properly. Any grit left behind gets ground straight back into the surface during polishing, which can leave you with more scratches than you started with, so wash the area with a proper glass cleaning routine, and dry it completely.
Once the glass is clean and dry, here’s the order worth trying:
- Baking soda paste. Mix baking soda with a small amount of water until it forms a thick paste, then work it into the scratch with a soft cloth in small circular motions. This can smooth very light surface haze, but don’t expect it to touch anything your fingernail catches on.
- Off-the-shelf glass polish. A dedicated glass polishing compound, applied with a microfibre cloth or foam applicator, goes a step further than baking soda for shallow scuffs. Follow the product’s instructions on dwell time and buff off fully before assessing the result.
- Reassess with the fingernail test. Check your progress after each pass rather than assuming more product means more improvement.
What to avoid entirely: toothpaste and WD-40. Toothpaste lacks the correct abrasive grade for glass and often just adds fine micro-scratching without touching the actual groove. WD-40 might temporarily mask a scratch by filling it with oil, but it doesn’t remove anything, attracts more dust, and can smear across your view the next time the wipers run. Resin-based chip repair kits are also the wrong tool here. They’re designed to fill a cavity left by a stone impact, and a wiper scratch is an open groove with no cavity for resin to bond into.
Cerium oxide polishing: step-by-step and safety guidance
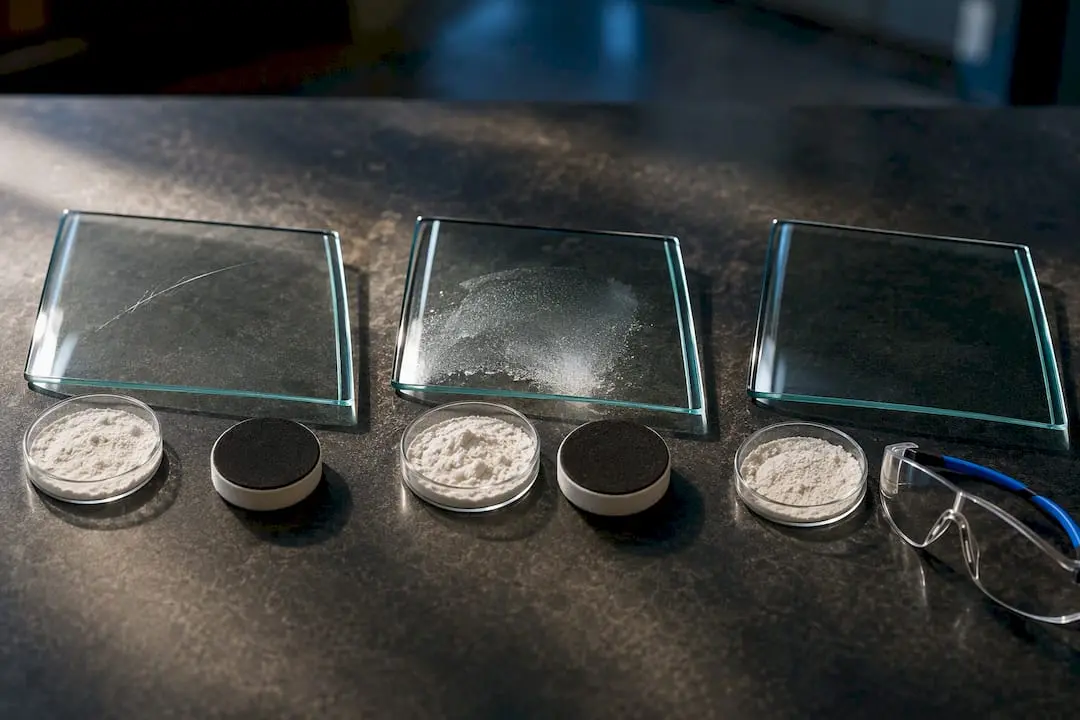
Cerium oxide is the industry standard for glass polishing. It works through gentle mechanical and chemical action that smooths silicate glass rather than just filling the mark, which is why professionals reach for it over generic compounds.
Tools and materials you’ll need:
- Cerium oxide powder
- A felt polishing pad
- A variable-speed polisher or drill
- Distilled water and a spray bottle
- Masking tape to protect the surrounding trim
- Several clean microfibre cloths
The procedure:
- Mask off the area around the scratch with tape to protect paint and trim.
- Mix cerium oxide with distilled water into a thin, workable slurry.
- Load the felt pad with slurry and keep both the pad and glass wet throughout. Dry cerium oxide is aggressively abrasive and can add fresh micro-scratches if it dries on the surface.
- Run the polisher at low to moderate speed, keeping the pad moving constantly rather than sitting on one spot.
- Work a blend area much wider than the scratch itself, not just the mark, to avoid creating an uneven dip in the glass.
- Check progress every couple of minutes with the fingernail test and a clean, dry look at the surface.
Stop immediately if: the glass feels warm to the touch, you notice any wavy or lens-like distortion when looking through the area, or you’re working anywhere in the driver’s direct line of sight. Cerium oxide needs controlled heat activation, and high-pressure spot work risks thermal shock or a permanently distorted patch of glass. Our partner guide on safe polishing limits recommends keeping glass temperature below 70°C throughout the process.
When to stop and call in a professional
Some signs mean it’s time to put the polish down and book an assessment instead of pushing further.
- Your fingernail catches firmly in the groove rather than just grazing it
- Multiple overlapping arcs cover a wide section of the glass
- The damage sits in front of a camera or sensor housing, since optical distortion can interfere with sensor function even when your eyes barely notice the mark
- You’ve already attempted polishing and now see glare or waviness at night that wasn’t there before
Professionals work with industrial equipment and controlled heat that let them blend larger areas evenly without the dishing effect a rushed DIY job can leave behind. Expect meaningful improvement rather than a guaranteed full removal on anything beyond light surface marks. For deep or widespread damage, especially anywhere in your direct field of view, replacement is usually the safer and more honest outcome than chasing a scratch that keeps coming back through the haze.
Preventing wiper scratches: blade care that actually works
Most wiper scratches trace back to one thing: a blade that should have been replaced weeks earlier. Watch for streaking, chattering, or a torn rubber insert, and act the moment you spot any of them rather than waiting for a full failure.
- Replace blades roughly every several months to a year, sooner in harsh sun or if the rubber feels stiff
- Never run wipers dry across a dusty windscreen; always hit the washer fluid first
- Clear grit and leaves from the cowl area before your first sweep after parking somewhere dusty
- Wipe the blade edge itself down periodically with a proper cleaning method to remove embedded grit
- Choose blades designed for your specific vehicle rather than a generic universal fit, and follow correct installation guidance
A technician’s perspective on realistic outcomes
Here’s the honest take: most people who ring around about a windscreen scratch are hoping for a miracle that doesn’t exist for driver-facing marks. If a scratch sits square in your line of sight, the safer call is almost always to stop polishing early and get a professional opinion, because a slightly hazy scratch is far easier to live with than a dished patch of glass that bends headlights into a smear every time you drive at night. When in doubt, stop.
— Faisal
Stop the scratches coming back: check your blade fit
Most wiper scratches start with a blade that’s already failing. Torn inserts, exposed metal edges, and rubber that’s hardened in the sun all turn your wipers into sandpaper the moment grit gets trapped underneath.

Com designs wiper blades specifically for Australian conditions, from extended UV exposure to sudden downpours, with vehicle-specific fitment covering over 2,500 models so you’re not stuck with a generic blade that flaps, chatters, or wears unevenly. Every set ships with a fitment guarantee, a 12 month warranty, and a 30 day money-back guarantee, and the vehicle selector tool makes finding your exact match straightforward before you commit to anything. If you drive a European model, the Mercedes-Benz fitment range shows the same level of detail across the lineup. Once your new blades arrive, the included step-by-step installation guide walks you through fitting them yourself in minutes. If your current blades show any sign of the wear that causes scratching, check your fit now and swap them out before they mark the glass again.
Sources
For deeper technical detail on the mechanics of glass polishing and blade damage, the wiper scratch and haze breakdown and the depth test and polishing limits guide both cover the failure modes in more depth than this article has room for. The safe polishing temperature guidance is worth bookmarking before any cerium oxide session.
- How worn-out wipers damage your windshield
- Engineerskill
- How to remove scratches from a car window
- Can bad wipers damage or scratch the windshield?
FAQ
Can windshield wiper scratches be removed?
Light surface scratches often improve significantly with careful polishing, but deep grooves that catch a fingernail generally can’t be fully removed at home and usually need professional repair or replacement.
Why did my windshield wipers scratch my windshield?
Worn wiper blades with exposed metal, hardened rubber, or torn inserts act like sandpaper against the glass, and trapped grit is one of the most common triggers for a fresh scratch appearing suddenly.
Does WD-40 really remove scratches?
No. WD-40 can temporarily mask a shallow mark by filling it with oil, but it doesn’t remove any glass and tends to attract dust and smear across your view soon after.
Can WD-40 remove glass scratches?
WD-40 isn’t a glass repair product. It offers no lasting fix and can leave residue that worsens streaking, so a proper glass polish or cerium oxide compound is the safer choice for genuine improvement.