
Why test wipers after windscreen replacement: your safety checklist
TL;DR:
- Testing wipers immediately after a windscreen replacement ensures safety and protects your warranty from common faults. Performing a quick three-speed check while still at the installer allows faults like streaking, skipping, or improper parking to be fixed on the spot, preventing damage and inspection failures. If issues persist, replacing worn blades is recommended, while documenting faults supports warranty claims and proper rework.
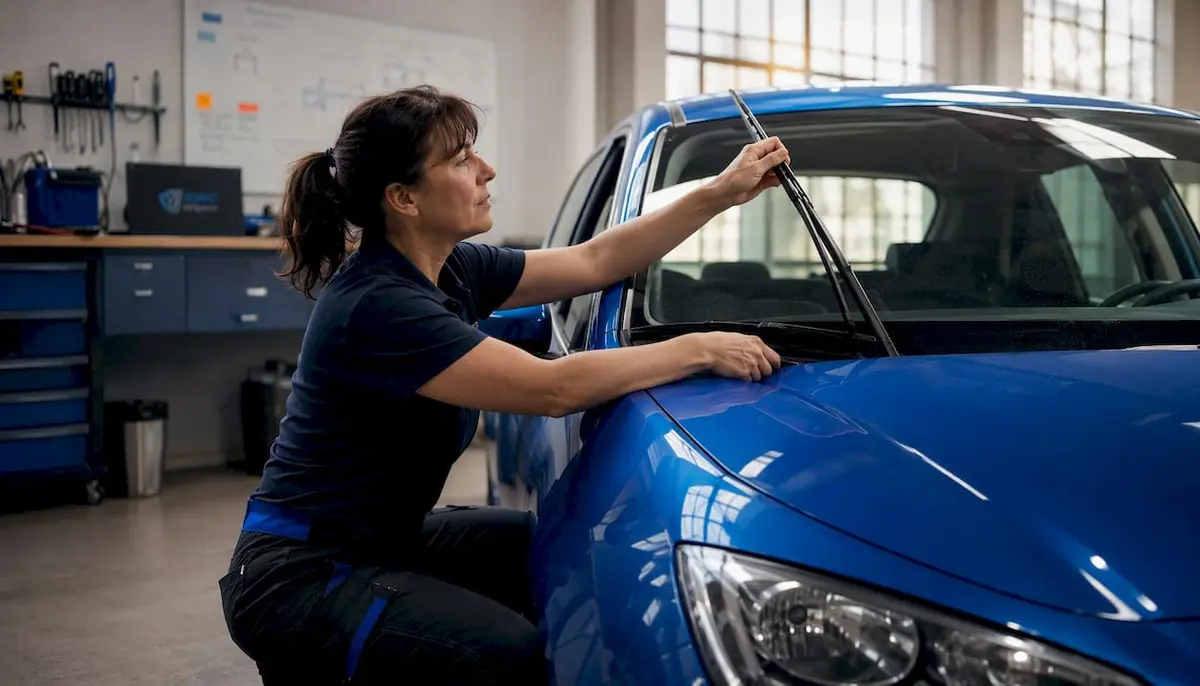
Test your wipers straight away after a windscreen replacement. Before you leave the installer’s bay, run the wipers with washer fluid, watch for streaking or skipping, confirm the blades park correctly, and check that no protective film or packaging remains on the rubber. These checks take under five minutes and can prevent a safety risk, a roadworthy fail, or a voided warranty.
What to do the moment the fitter finishes:
- Remove any protective film or packaging from the new blades
- Activate the wipers with washer fluid across three speeds: single sweep, low continuous, and high speed
- Watch for streaks, skips, chatter, or scraping sounds
- Confirm the blades return to the correct park position when switched off
- Photograph any faults before you drive away
Wiper performance is a roadworthy inspection item in Australia. Streaking or skipping blades can cause a fail, and catching the problem at the installer means it gets fixed for free, on the spot.
Table of Contents
- Why testing wipers after windscreen replacement is non-negotiable
- When should you run the post-install test?
- How to test your windscreen wipers step by step
- What common faults during testing actually mean
- Quick fixes you can try before returning to the installer
- When to stop troubleshooting and go back to the installer
- What a professional fitter checks that owners often miss
- Aftercare to keep your new windscreen and blades in good shape
- Key takeaways
- The test that matters most happens before you start the engine
- When the test reveals worn blades: GWC Wipers has you covered
- Useful sources
- FAQ
Why testing wipers after windscreen replacement is non-negotiable
Clear visibility is the most direct safety benefit of a post-install wiper test. Blades that skip or streak leave uncleared areas across the driver’s vision zone, and in heavy rain that gap between clean glass and smeared glass can be the difference between seeing a hazard and not. Skipping or streaking blades are a common roadworthy fail item in Australia, so the stakes extend beyond comfort.
Damage prevention is the second reason. Old or hardened blades can expose metal or hard plastic backing that contacts the new glass directly, leaving fine scratches most visible under direct sunlight or headlight glare. Those scratches are effectively permanent. A quick test immediately after fitting catches this before any damage occurs.
Warranty and compliance are the third layer. If you drive away without testing and later discover a fault, proving it was an installation issue becomes harder. Documenting any defect with photos while still at the installer protects your position for warranty claims and rework requests.
Over 90% of new vehicles include ADAS features that rely on windscreen-mounted cameras or sensors. A windscreen replacement can affect rain-sensing wipers and lane-assist cameras simultaneously, so the post-install check covers more than just the rubber blades.
When should you run the post-install test?
The right time is before you leave the installer’s premises. If a fault exists, the fitter can correct it immediately at no extra cost. Driving away first means a return trip, a potential dispute, and the risk of scratching your new glass in the meantime.
Timing guidance:
- Run the test while the installer is still present so corrections happen on the spot
- If the installer asks you to wait a short period for adhesive to set, ask specifically whether activating the wipers to check alignment is safe — in most cases it is
- Run one full on/off cycle to let the motor return to its home (park) position before checking arm alignment
- If you or the fitter removed and refitted the wiper arms, do not tighten the mount nuts until after that first cycle confirms correct park position
Pro Tip: Never let a wiper arm snap back onto the glass uncontrolled. Always lower the arm gently, or place a folded towel on the windscreen to cushion it. Snapping arms back can crack or chip a newly fitted windscreen.
How to test your windscreen wipers step by step
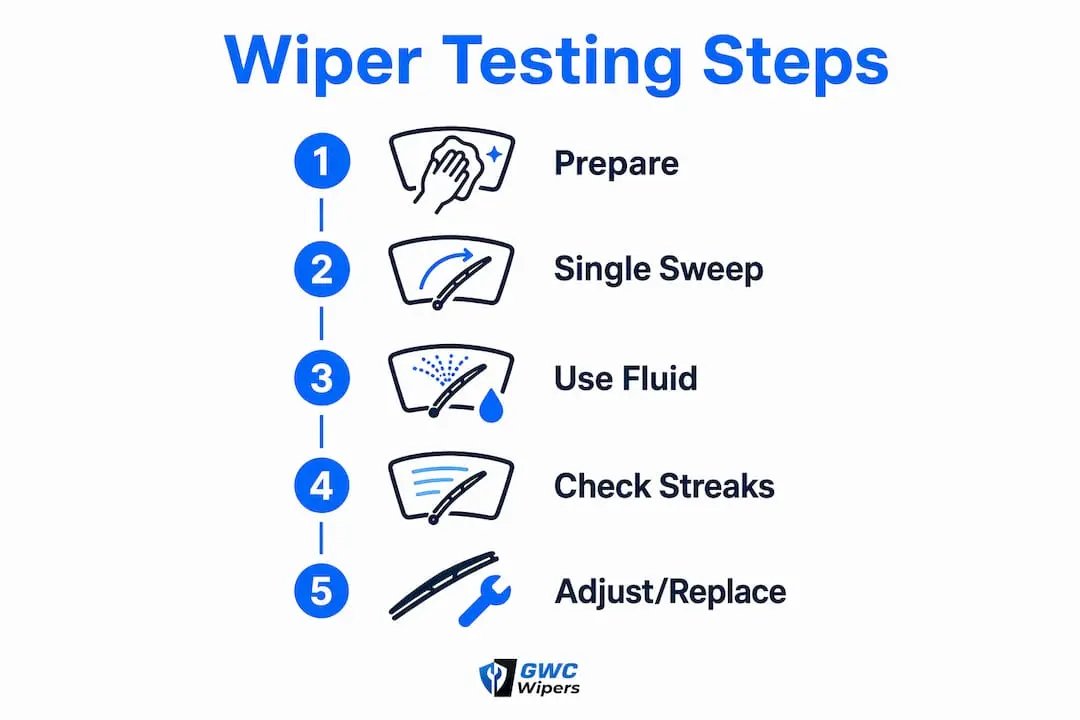
A structured test takes less than five minutes and covers every common fault mode. Work through the steps in order.
- Visual inspection first. Check both blades for protective film or packaging. Peel off any film before activating the wipers — running blades with film attached causes immediate streaking and can scratch the glass.
- Check arm position. Confirm both arms sit flat against the glass with even contact along the full blade length. Gaps at either end suggest a fitment or pressure issue.
- Single sweep with washer fluid. Activate one wiper cycle and watch the full sweep arc. The glass should clear cleanly with no smeared patches.
- Low continuous speed. Run the wipers on low for 15–20 seconds. Listen for chatter, squeaking, or scraping. Watch for skipping across any part of the screen.
- High speed with washer fluid. Increase to high speed and spray washer fluid. This is the most demanding condition and exposes pressure and alignment faults that low speed hides.
- Verify park position. Switch the wipers off and confirm both blades return to the correct resting position, fully within the windscreen area and not resting on the cowl or pillars.
- Document any faults. If anything looks or sounds wrong, take timestamped photos and a short video before asking the fitter to correct it.
A three-step test across single sweep, low speed, and high speed with washer fluid exposes streaking, skipping, and park-position problems efficiently — and takes under five minutes to complete.
| Test condition | What to watch for | Likely fault if present |
|---|---|---|
| Single sweep, no fluid | Streaks or smears | Worn rubber, protective film still on blade |
| Low speed, with fluid | Chatter, skipping, squeaking | Incorrect pressure, misaligned arm |
| High speed, with fluid | Overshooting, scraping noise | Park misalignment, metal-to-glass contact |
| Wipers off | Blades outside sweep zone | Incorrect arm spline positioning |
For a deeper look at wiper blade performance testing, the structured speed-and-mode matrix is the fastest way to isolate which fault you are dealing with.
What common faults during testing actually mean
Knowing what a symptom points to saves time and helps you decide whether to ask the fitter for a quick adjustment or whether the problem needs a proper rework.
Streaking or smeared areas usually mean worn or contaminated blade rubber, or protective film still on the blade. This is the most common post-install complaint and often resolves with a clean or a film removal.
Skipping or chatter suggests the blade is not maintaining consistent contact across the sweep. The cause is typically incorrect arm pressure, a warped blade, or an arm that was not seated correctly on the spline after the windscreen was fitted.
Scraping or grinding sounds are the most urgent warning sign. Hardened or cracked rubber exposes the blade’s metal or plastic backing, which can produce fine scratches on new glass that are permanent and most visible under direct sunlight or headlight glare. Stop the wipers immediately if you hear this.
Wipers overshooting or stopping off-screen points to an arm that was not correctly repositioned on the drive spline after the replacement. The motor parks to a fixed position, so if the arm was refitted even slightly off, the blade will rest outside the intended zone.
Pro Tip: If you suspect the blade rubber is the problem rather than the arm or fitment, run a clean cloth dampened with washer fluid along the rubber edge. If streaking improves immediately, contamination was the cause. If it persists, the rubber itself needs replacing.
Quick fixes you can try before returning to the installer
Some faults have a simple, non-invasive fix you can attempt on the spot. Try these in order before concluding the problem needs a fitter.
- Clean the windscreen and blades with washer fluid. Road grime or residue from the installation process often causes streaking that disappears after a thorough clean.
- Remove any remaining packaging or protective film from the blade rubber. Even a small strip of film causes persistent streaking.
- Check blade-to-glass contact along the full length. Press gently along the blade to feel for sections that lift away from the glass — this indicates a pressure or fitment issue rather than a dirty blade.
- Re-seat wiper arms carefully if the installer permits. Turn the wipers on briefly to let the motor park, switch off, then re-tighten the mount nut to the manufacturer’s specification. Do not guess at torque.
- Never force an arm down or let it snap back. Always lower arms gently onto the glass or place a folded towel underneath to protect the new windscreen during any adjustment.
Pro Tip: For a full set of wiper protection tips that extend blade life after installation, a clean rubber edge and a clean windscreen surface are the two factors that matter most.
When to stop troubleshooting and go back to the installer
Some faults are beyond a quick roadside fix. Return to the installer immediately if:
- The blades scrape the glass with any metallic or grinding sound
- Any part of the driver’s primary vision area is left uncleared after a full sweep
- The wipers park outside the windscreen boundary or fail to return to the home position
- The motor runs but the blades do not move, or move erratically
Evidence to collect before you go back:
- Timestamped photos and a short video of the fault across all speeds
- The fitter’s name, job number, and date of installation
- Any post-fit care instructions the fitter provided
- A note of exactly when the fault appeared (immediately after fitting, or after a short drive)
Documenting faults with photos and video at the installer reduces dispute friction and speeds warranty or rework outcomes. The stronger your evidence, the faster the resolution.
If you have a roadworthy certificate (RWC) coming up, address any wiper fault beforehand. Streaking or skipping blades are a common fail item, and fixing them before the inspection is far simpler than a re-inspection fee. The windshield clarity checklist covers the visibility checks most relevant to Australian roadworthy preparation.
| Fault | Severity | Action |
|---|---|---|
| Streaking after cleaning | Low | Try blade clean or replacement |
| Skipping or chatter | Medium | Ask fitter to check arm pressure and spline |
| Scraping or grinding | High | Return to installer immediately |
| Incorrect park position | High | Return to installer for arm realignment |
What a professional fitter checks that owners often miss
A thorough installation involves more than fitting the glass and reattaching the wipers. These are the technician-level checks worth asking about before you drive away.
- ADAS camera and rain sensor seating. In vehicles with rain-sensing auto wipers, the sensor must be correctly aligned relative to the camera after replacement. Misalignment can cause false triggers or complete non-operation of auto wipers.
- Correct arm spline positioning. The wiper arm must be seated on the drive spline at the exact position the motor expects. Even a single spline tooth off will cause the blade to park incorrectly.
- Correct torque on wiper arm nuts. Under-torqued nuts allow the arm to shift during operation; over-torqued nuts can strip the spline. A professional fitter uses a torque specification, not feel.
- Blade pressure distribution. The blade should maintain even contact across its full length at all speeds. Uneven pressure produces the skipping and chatter that owners often mistake for a blade quality issue.
- Static or dynamic ADAS calibration where the vehicle requires it. Ask the fitter explicitly whether calibration was performed and request documentation.
Pro Tip: Before you leave, ask the fitter to run a single wiper cycle and point out the park position. A reputable installer will do this without hesitation. If they cannot demonstrate correct park, that is a red flag worth addressing before you drive.
Aftercare to keep your new windscreen and blades in good shape
The first few days after a windscreen replacement set the tone for long-term performance. A few straightforward habits protect both the new glass and the blades.
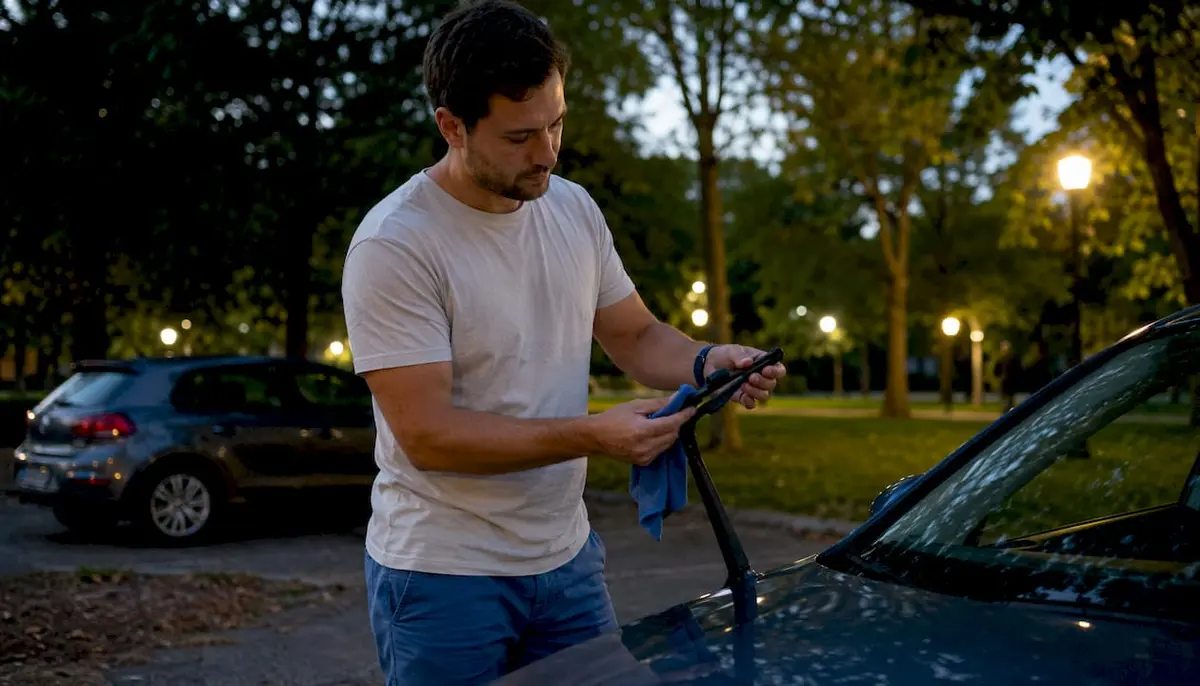
Avoid high-pressure car washes for the period your installer recommends, as the adhesive seal around the new glass needs time to fully cure. Routine gentle cleaning with washer fluid is fine and actually extends blade life by preventing the grit build-up that accelerates rubber degradation.
Never let a worn blade stay on new glass. Once the rubber edge rounds off or cracks, the backing structure moves closer to the glass surface with every sweep. The resulting micro-scratches are most visible in direct sunlight and cannot be polished out. For seasonal care in cooler climates, the winter windshield protection guide covers the specific risks of frozen blades and cold-weather rubber hardening.
Key takeaways
Testing your wipers immediately after a windscreen replacement is the single most effective step to protect your safety, your new glass, and your warranty.
| Point | Details |
|---|---|
| Test before you leave | Run wipers with washer fluid across three speeds while still at the installer. |
| Top faults to watch for | Streaking, skipping or chatter, scraping sounds, and incorrect park position. |
| Collect evidence | Timestamped photos and video of any fault support warranty claims and rework requests. |
| Roadworthy risk | Streaking or skipping blades are a common Australian roadworthy fail item — fix them before any inspection. |
| GWC Wipers for blade replacement | When tests show worn rubber or persistent streaking, replace blades with vehicle-specific options backed by a 12-month warranty. |
The test that matters most happens before you start the engine
Most wiper problems after a windscreen replacement are simple to fix when caught immediately. An arm seated one spline tooth off, a strip of protective film left on the rubber, or a blade that was not cleaned before refitting — these are two-minute corrections at the installer’s bay that become a half-day return trip if you drive away first.
What owners underestimate is how quickly a worn or misaligned blade can damage new glass. The scratches are not dramatic; they are fine lines that only show up when the sun hits the windscreen at a low angle. By the time you notice them, the damage is done. That is why the post-install test is not a courtesy check — it is the last point at which you have full leverage to get the installation right at no extra cost.
If your vehicle has ADAS features, ask explicitly about calibration documentation before you leave. A fitter who completed the calibration will have the paperwork. One who did not will not.
When the test reveals worn blades: GWC Wipers has you covered
If your post-install test shows persistent streaking, metal-to-glass contact, or rubber that is clearly past its best, the answer is a blade replacement, not repeated arm adjustments. New glass deserves new blades.
GWC Wipers is an Australian e-commerce retailer offering vehicle-specific wiper blades built for Australian conditions, from coastal humidity to outback UV exposure. Every blade comes with a fitment guarantee covering over 2,500 vehicle models, a 30-day money-back guarantee, and a 12-month warranty. Free shipping applies across Australia. If your test confirms the blades are the problem, find your vehicle-specific fit for Toyota models, Mercedes-Benz GLE, or browse the full Mercedes-Benz range to get the right blade for your car. If the fault is the motor, arm alignment, or ADAS calibration, go back to the fitter — blades will not fix a mechanical or electronic issue.
Useful sources
The following resources support the guidance in this article and are worth bookmarking for further detail on roadworthy requirements, ADAS calibration, and wiper maintenance.
- What will fail a roadworthy in QLD? — Car One — Australian roadworthy fail items including wiper performance
- ADAS calibration after windscreen replacement — DC Auto Glass — Why modern vehicles need recalibration and what it involves
- How to check and replace wiper blades — RAC Drive — Step-by-step blade replacement and safe arm handling
- How often should you replace windscreen wipers? — Carwow — Replacement intervals and warning signs
- Common mistakes after auto glass replacement — Bankstown Mobile Windscreens — Post-install checklist and evidence collection advice
| Resource | Best for |
|---|---|
| Car One — QLD roadworthy guide | Understanding which wiper faults cause inspection fails |
| DC Auto Glass — ADAS calibration | Checking whether your vehicle needs post-replacement calibration |
| RAC Drive — wiper replacement guide | Safe arm handling and blade fitting technique |
| Carwow — replacement intervals | Knowing when to replace blades based on climate and use |
| Bankstown Mobile Windscreens | Post-install fault documentation and warranty steps |
FAQ
What should you avoid doing right after a windscreen replacement?
Avoid activating the wipers on a dry screen, using a high-pressure car wash before the adhesive has fully cured, and driving away without testing wiper function first. Always check for protective film on the blades before switching them on.
Why are my new wipers not clearing the screen properly?
The most common causes are protective film still on the rubber, contamination from the installation process, or an arm that was not correctly repositioned on the drive spline. Run the three-speed test with washer fluid to identify which fault is present, then clean the blades and glass before returning to the installer if the problem persists.
Why aren’t my wipers working at all after a windscreen replacement?
If the motor runs but the blades do not move, or the wipers fail to return to the park position, the wiper arm spline was likely not correctly seated during the installation. This is an installer-level fix — return to the fitter with timestamped photos of the fault.
Is it safe to use WD-40 on wiper blades?
No. WD-40 degrades rubber and will cause the blade to smear rather than clear the glass. Clean wiper blades with a cloth dampened with washer fluid only.